Kia Cadenza YG: Air Conditioning System / Condenser Repair procedures
Kia Cadenza YG 2016-2021 Service Manual / Heating,Ventilation, Air Conditioning / Air Conditioning System / Condenser Repair procedures
| Inspection |
| 1. |
Check the condenser fins for clogging and damage. If clogged,
clean them with water, and blow them with compressed air. If bent,
gently bend them using a screwdriver or pliers. |
| 2. |
Check the condenser connections for leakage, and repair or replace it, if required. |
| Replacement |
| 1. |
Recover the refrigerant with a recovery/recycling/charging station. |
| 2. |
Disconnect the negative (-) battery terminal. |
| 3. |
Remove the front bumper.
(Refer to the BD group - "Front Bumper") |
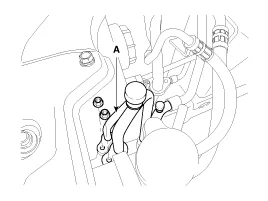
| 4. |
Remove the 2 nuts, and then disconnect the discharge line and liquid line (A) from the condenser.
|
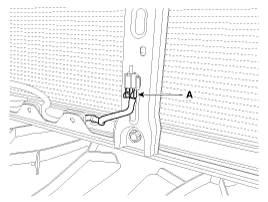
| 5. |
Disconnect the ambient temperature sensor connector (A).
|
| 6. |
Disconnect the horn connector (A).
[LH]
[RH]
|


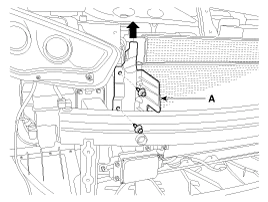
| 7. |
Remove the radiator upper brackat assembly (A) by loosening the mounting bolts.
|

| 8. |
Remove the side air guard (A) by pulling it upwards.
[LH]
[RH]
|

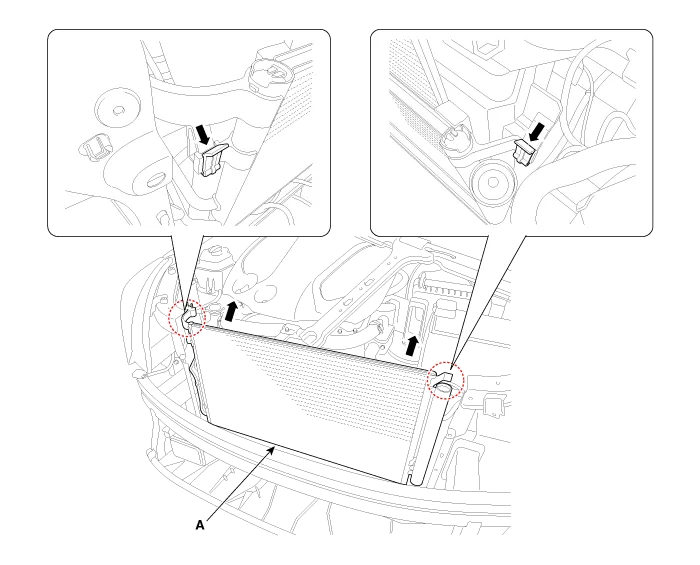
| 9. |
Remove the condenser (A) from radiator.
|
| 10. |
Install in the reverse order of removal, and note these items :
|
Component Location
Replacement 1. Remove the condenser, and then remove the bottom cap (B) with L wrench (A) from the condenser. Tightening torque : 9.8~14.7N.m (1.
Other information:
Kia Cadenza YG 2016-2021 Service Manual: Cluster ionizer Description and Operation
Description 1. The function of cluster ion generator is cleaning air by sterilizing and dissolving of air conditioner. 2. The function of cluster ion generator is controlling mold caused by stench of air conditioner and external inflow of air.
Kia Cadenza YG 2016-2021 Service Manual: Blower Motor Repair procedures
Inspection 1. Connect the battery voltage and check the blower motor rotation. 2. If the blower motor voltage is not operated well, substitute with a known-good blower motor and check for proper operation. 3. If the problem is corrected, replace the blower motor.
Categories
- Manuals Home
- Kia Cadenza Owners Manual
- Kia Cadenza Service Manual
- Steering System
- Restraint
- Specifications
- New on site
- Most important about car

Copyright © 2026 www.kcadenzavg.com - 0.0183