Kia Cadenza: Brake System / Brake Line Repair procedures
Kia Cadenza YG 2016-2025 Service Manual / Brake System / Brake System / Brake Line Repair procedures
| Removal |
| 1. |
Disconnect the brake fiuid level switch connector, and remove the reservoir cap. |
| 2. |
Remove the brake fluid from the master cylinder reservior with a syringe.
|

| 3. |
Remove the wheel & tire. |
| 4. |
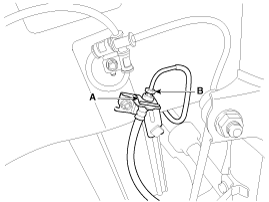
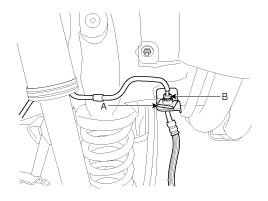
Disconnect the brake tube by loosening the tube flare nut (B).
Front
Rear
|
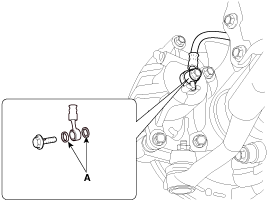
| 5. |
Remove the brake hose clip (A). |
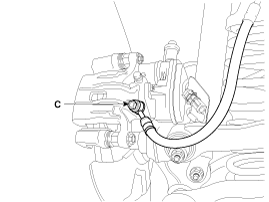
| 6. |
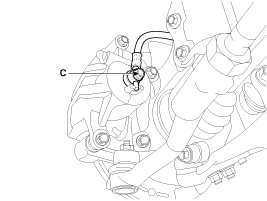
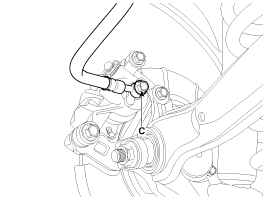
Disconnect the brake hose from the brake caliper by loosening the bolt (C).
Front
Rear [Without EPB]
Rear [With EPB]
|
| Inspection |
| 1. |
Check the brake tubes for cracks, crimps and corrosion. |
| 2. |
Check the brake hoses for cracks, damage and fluid leakage. |
| 3. |
Check the brake tube flare nuts for damage and fluid leakage. |
| 4. |
Check brake hose mounting bracket for crack or deformation. |
| Installation |
| 1. |
Installation is the reverse of removal.
|
| 2. |
After installation, bleed the brake system. (Refer to Brake system bleeding) |
| 3. |
Check the spilled brake oil. |
 Brake Line Components and Components Location
Components
...
 Brake Pedal Components and Components Location
Components
1. Cowl bracket2. Brake pedal member assembly3. Stop lamp switch4. Return spring5. Brake pedal stopper6. Clevis pin7. Snap pin8. Brake pedal
...
Other information:
Kia Cadenza YG 2016-2025 Owners Manual: Climate control air filter
The climate control air filter installed behind the glove box, filters dust or other pollutants that come into the vehicle from the outside through the heating and air conditioning system. If dust or other pollutants accumulate in the filter over a period of time, air flow from the a ...
Kia Cadenza YG 2016-2025 Service Manual: Cylinder Block Repair procedures
Disassembly • Use fender covers to avoid damaging painted surfaces. • To avoid damage, unplug the wiring connectors carefully while holding the connector portion. • Mark all wiring and hoses to avoid misc ...
Copyright © www.kcadenzavg.com 2017-2025
