Kia Cadenza: Smart key System / Smart key Repair procedures
Kia Cadenza YG 2016-2025 Service Manual / Body Electrical System / Smart key System / Smart key Repair procedures
| Smart Key |
Smart Key Code Saving
| 1. |
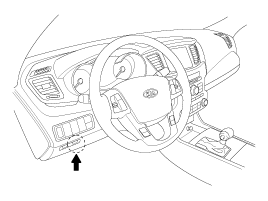
Connect the DLC cable of GDS to the data link connector in driver side crash pad lower panel, turn the power on GDS.
|
| 2. |
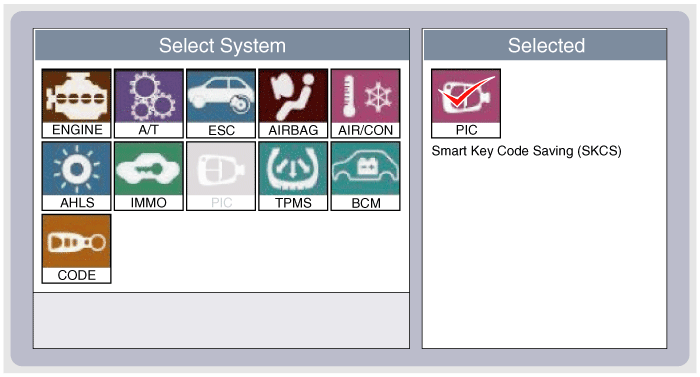
Select the vehicle model and then do "Smart key code saving".
|

| 3. |
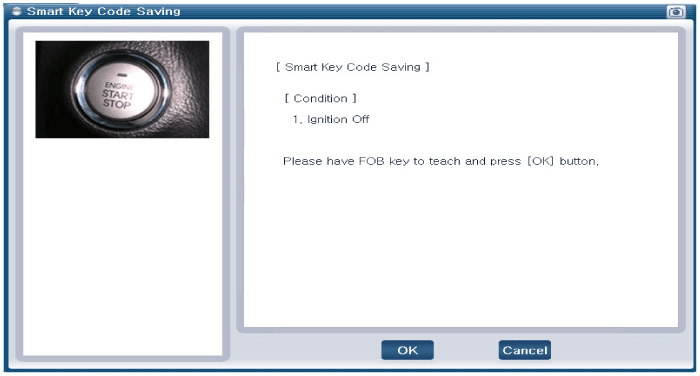
After selecting "Smart key teaching" menu, push "Enter" key, then the screen will be shown as below.
|
| 4. |
After having the teaching smart key, push "ENTER" key. |
| 5. |
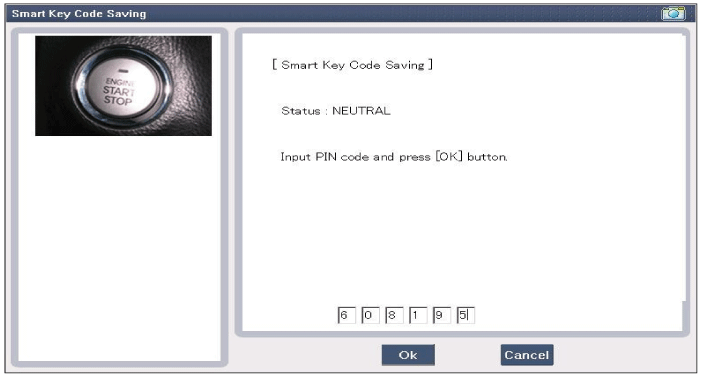
Input the "Pin code" for first key teaching.
|
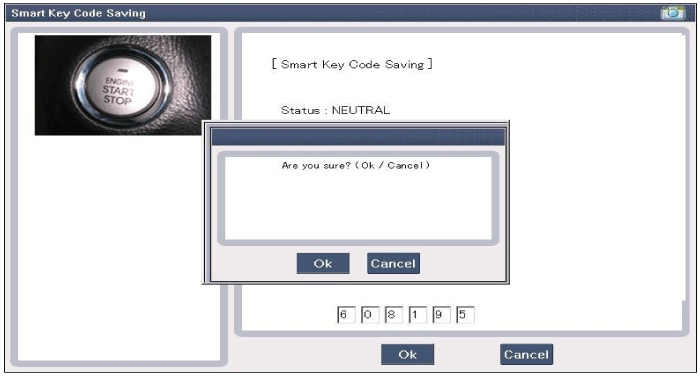
| 6. |
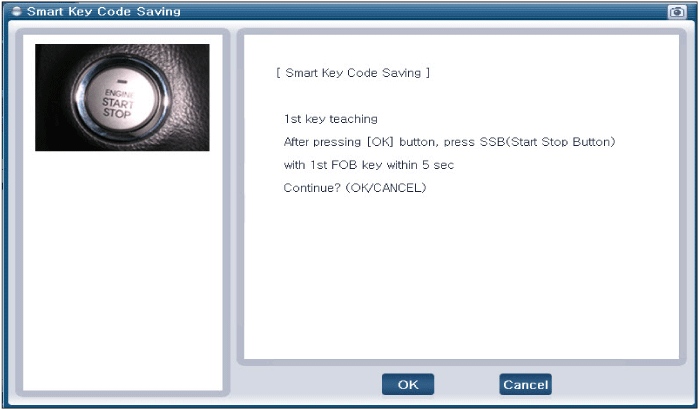
Press the SSB with smart key within 5 sec after pressing "OK".
|
| 7. |
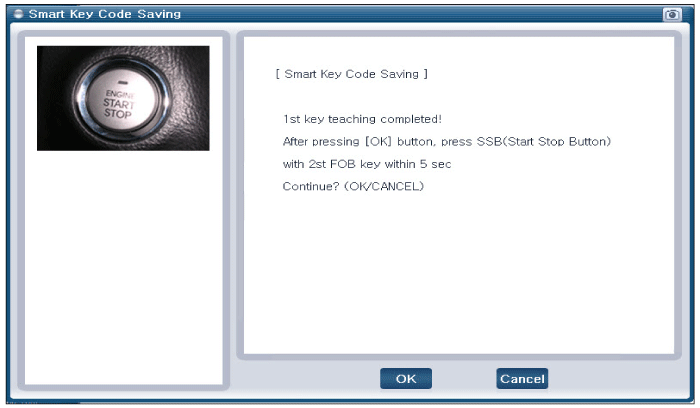
Confirm the message "First key teaching completed".
|
| 8. |
Press the SSB with smart key within 5 sec after pressing "OK".
|
| 9. |
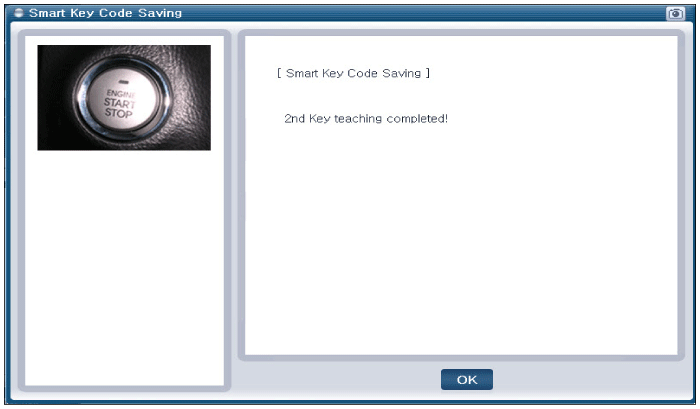
Confirm the message "Second key teaching completed".
|
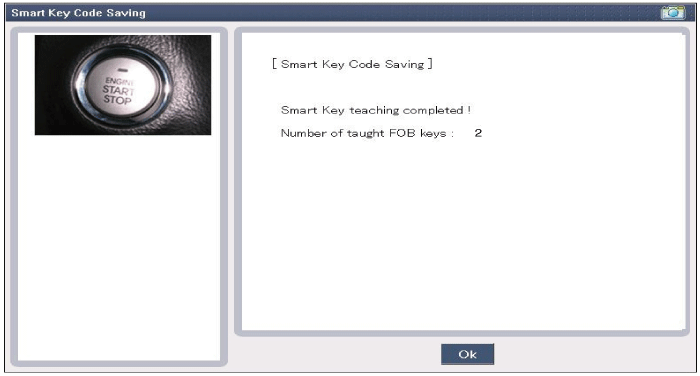
| 10. |
Then the screen will be shown as below when key teaching process is completed.
|
 Repair procedures
Inspection
Self Diagnosis With GDS
Smart key system defects can be quickly diagnosed with the
GDS. GDS operates actuator quickly to monitor, input/output value and
self diagnosis.
The followi ...
 Smart key unit Components and Components Location
Component (1)
Connector Pin Information
No.Connector A (26 pins)Connector B (16 pins)Connector C (22 pins)1VBAT loadC CAN lowSSB illumination ground2-C CAN high-3Power ground 1-SSB LED OFF4IGN 1 ...
Other information:
Kia Cadenza YG 2016-2025 Owners Manual: Recommended lubricants and capacities
To help achieve proper engine and powertrain performance and durability, use only lubricants of the proper quality. The correct lubricants also help promote engine efficiency that results in improved fuel economy. These lubricants and fluids are recommended for use in your vehicle. Recomm ...
Kia Cadenza YG 2016-2025 Service Manual: ESC OFF Switch Repair procedures
Inspection 1. Turn ignition switch OFF and disconnect the negative (-) battery cable. 2. Remove the passenger compartment juction box cover. 3. Remove the crash pad side switch assembly (A) by pushing it through juction box cover hole. Put on gloves to prote ...
Copyright © www.kcadenzavg.com 2017-2025
