Kia Cadenza YG: General Information / Warning And Caution Labels
| Warning And Caution Labels |
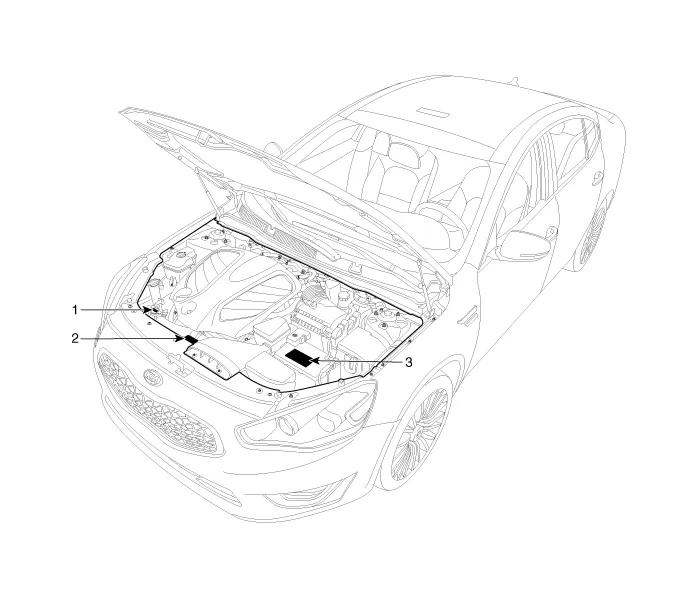
| 1. Radiator cap caution 2. Fan caution |
3. Battery caution |
Battery Caution Label
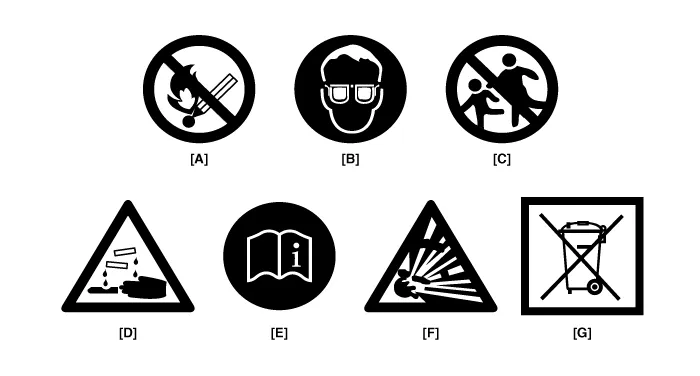
| A. Keep lighted cigarettes and all other flames or sparks away from the battery. |
| B. Wear eye protection when charging or working near a battery. Always provide ventilation when working in an enclosed space.
|
| C. Keep batteries out of the reach of children because batteries contain highly corrosive SULFURIC ACID. Do not allow battery acid to contact your skin, eyes, clothing or paint finish. |
| D. If any electrolyte gets into your eyes, flush your eyes with clean water for at least 15 minutes and get immediate medical attention. If possible, continue to apply water with a sponge or cloth until medical attention is received. If electrolyte gets on your skin, throughly wash the contacted area. If you feel a pain or a burning sensation, get medical attention immediately. |
| E. Always read the following instructions carefully when handing a battery. |
| F. Hydrogen, which is a highly combustible gas, is always presents in battery cells and may explode if ignited. |
| G. An improperly disposed battery can be harmful to the environment and human health. Always confirm local regulations for battery disposal. |
Handling And Storage The Battery
| Battery Itself |
|
||||||
| Battery on Vehicle |
|
|

Identification Number Identification Number Description Vehicle Identification Number 1.
Lift And Support Points When heavy rear components such as suspension, fuel tank, spare tire, tailgate and trunk lid are to be removed, place additional weight in the luggage area before hoisting.
Other information:
Kia Cadenza YG 2016-2021 Service Manual: Description and Operation
Description System Operation Typically, lane departure warning is activated at a speed over 70 KPH, but suppressed in case of unintentional lane departure when driver do not operate turn signal. System Operation Conditions 1. User Conditions (1) When unintended lane departure is occured, warnings are generated.
Kia Cadenza YG 2016-2021 Service Manual: Refrigerant line Repair procedures
Replacement 1. Discharge refrigerant from refrigeration system. 2. Replace faulty tube or hose. Cap the open fittings immediately to keep moisture or dirt out of the system. 3. Tighten joint of bolt or nut to specified torque.
Categories
- Manuals Home
- Kia Cadenza Owners Manual
- Kia Cadenza Service Manual
- General Information
- Schematic Diagrams
- Engine Control / Fuel System
- New on site
- Most important about car
