Kia Cadenza YG: Cooling System / Cooling Fan Repair procedures
Kia Cadenza YG 2016-2021 Service Manual / Engine Mechanical System / Cooling System / Cooling Fan Repair procedures
| Removal and Installaton |
| Cooling Fan Assembly |
| 1. |
Disconnect the battery negative terminal. |
| 2. |
Remove the air duct (A).
|

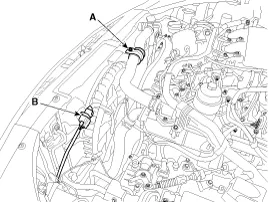
| 3. |
3. Loosen the upper hose fixing bolt (A), and disconnect the fan motor connector (B).
|

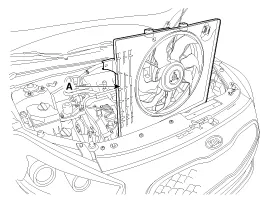
| 4. |
Remove cooling fan assembly (A).
|
| 5. |
Install in the reverse order of removal. |
| Inspection |
| 1. |
Disconnect the fan motor connector from the resistor. |
| 2. |
Connect the battery voltage to the "+" terminal and ground to "-" terminal. |
| 3. |
Check the cooling fan motor operates well. |
Circuit Diagram
Components 1. Radiator2. Mounting insulator3. Radiator upper hose4. Radiator lower hose5. Coolant reservoir tank6. Over flow hose7. ATF cooler hose
Other information:
Kia Cadenza YG 2016-2021 Service Manual: Auto Head lamp leveling Unit Repair procedures
Removal Height Sensor 1. Remove the height sensor connector (A). 2. Loosen the mounting bolts(Body: 2EA, chassis: 1EA) from height sensor bracket. Tightening torque : 3 ~ 5N.m (30 ~ 50kgf.m, 2.21 ~ 3.68lb-ft) 3. Remove the height sensor.
Kia Cadenza YG 2016-2021 Service Manual: Ambient Sensor Description and Operation
Description 1. The ambient temperature sensor is located at the front of the condenser and detects ambient air temperature. It is a negative type thermistor resistance will increase with lower temperature, and decrease with higher temperatures.
Categories
- Manuals Home
- Kia Cadenza Owners Manual
- Kia Cadenza Service Manual
- Restraint
- Automatic Transaxle System
- Steering System
- New on site
- Most important about car

Copyright © 2026 www.kcadenzavg.com - 0.0177