Kia Cadenza YG: Fuel Delivery System / Fuel Tank Repair procedures
| Removal |
| 1. |
Release the residual pressure in fuel line.
(Refer to the Fuel Delivery System - Repair Procedures - "Release Residual Pressure in Fuel Line"). |
| 2. |
Remove the floor mat after open the trunk. |
| 3. |
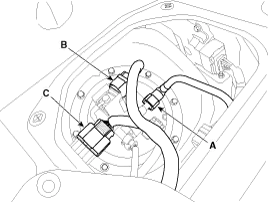
Remove the fuel pump service cover (A) in the trunk.
|

| 4. |
Disconnect the fuel feed tube quick-connector (A). |
| 5. |
Disconnect the fuel tank pressure sensor connector (B). |
| 6. |
Disconnect the fuel pump control module & fuel pump extension connector (C).
|
| 7. |
Lift the vehicle. |
| 8. |
Remove the main muffer. (Refer to Engine Mechanical System - "Muffler") |
| 9. |
Support the fuel tank with a jack. |
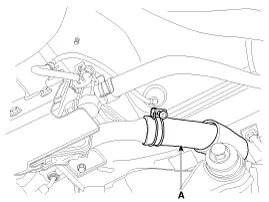
| 10. |
Disconnect the fuel filler hose (A).
|
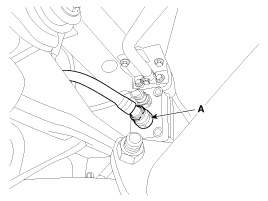
| 11. |
Disconnect the vapor hose quick-connector (A).
|
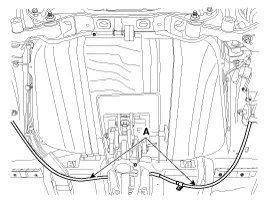
| 12. |
Remove the parking brake line (A). [NON - EPB type]
|
| 13. |
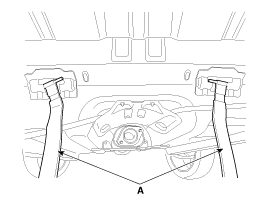
Remove the fuel tank bands (A) installation nuts.
|
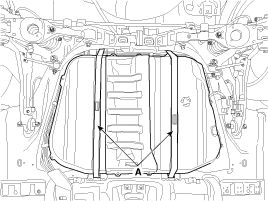
| 14. |
Remove the fuel tank after removing the fuel tank band (A) as below.
|
| Installation |
| 1. |
Install in the reverse order of removal.
|
Fuel Pressure Test (Low pressure system) 1. Release the residual pressure in fuel line. (Refer to the Fuel Delivery System - Repair Procedures - "Release Residual Pressure in Fuel Line").
Inspection [Fuel pump] 1. Turn the ignition switch OFF, and then remove battery (-) cable. 2. Remove the fuel pump assembly. 3. Check that motor operates properly when applying battery voltage to terminals 2 and 4 of fuel pump connector (A).
Other information:
Kia Cadenza YG 2016-2021 Service Manual: Components and Components Location
Component Location 1. Start Stop Button(SSB)2. FOB key3. RF receiver4. Smart key unit5. Interior antenna 16. Interior antenna 2 7. Trunk antenna8. Bumper antenna9. Door handle & door antenna10. Trunk lid open switch11.
Kia Cadenza YG 2016-2021 Service Manual: Photo Sensor Description and Operation
Description 1. The photo sensor is located at the center of defrost nozzle. 2. The photo sensor contains a photovoltaic (sensitive to sunlight) diode. The solar radiation received by its light receiving portion, generates an electromotive force in proportion to the amount of radiation received which is transferred to the automatic tem
Categories
- Manuals Home
- Kia Cadenza Owners Manual
- Kia Cadenza Service Manual
- Automatic Transaxle System
- Timing Chain Repair procedures
- Emission Control System
- New on site
- Most important about car
