Kia Cadenza: Interior / Interior Trim Repair procedures
Door Scuff Trim Replacement
•
Put on gloves to protect your hands.
•
When prying with a flat-tip screwdriver, wrap it with protective tape to prevent damage.
•
Take care not to bend or scratch the trim and panels.
1.
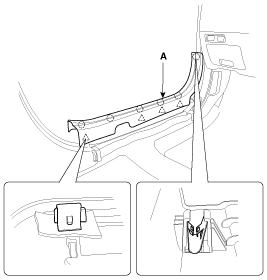
Using a screwdriver or remover, remove the front door scuff tirm (A).
[Front]
2.
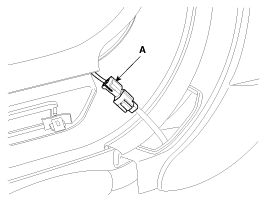
Disconnect the connector (A).
3.
Remove the rear seat.
(Refer to the BD group - "Rear Seat")
4.
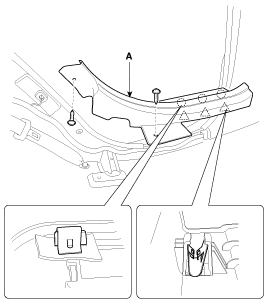
After loosening the mounting screws, then remove rear door scuff trim (A).
[Rear]
5.
Installation is the reverse of removal.
•
Replace any damage clips.
Front Pillar Trim Replacement
•
Put on gloves to protect your hands.
•
When prying with a flat-tip screwdriver, wrap it with protective tape to prevent damage.
•
Take care not to bend or scratch the trim and panels.
1.
After loosening the mounting bolt, then remove the front pillar trim (A).
2.
Installation is the reverse of removal.
•
Replace any damage clips.
Cowl Side Trim Replacement
•
Put on gloves to protect your hands.
•
When prying with a flat-tip screwdriver, wrap it with protective tape to prevent damage.
•
Take care not to bend or scratch the trim and panels.
1.
Remove the front door scuff trim.
2.
Remove the hood latch release handle.
(Refer to the BD group - "Hood")
3.
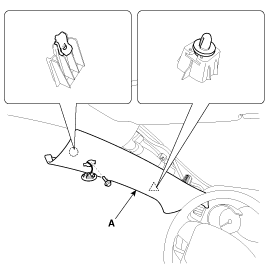
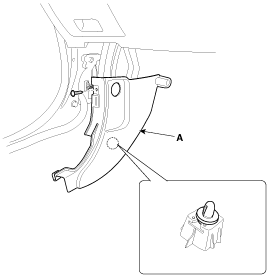
After loosening the mounting screw, then remove the cowl side trim (A).
4.
Installation is the reverse of removal.
Center Pillar Trim Replacement
•
Put on gloves to protect your hands.
•
When prying with a flat-tip screwdriver, wrap it with protective tape to prevent damage.
•
Take care not to bend or scratch the trim and panels.
1.
Remove the front door scuff trim and rear door scuff trim.
2.
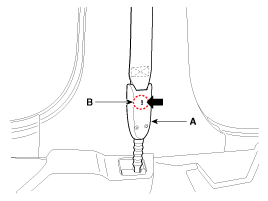
The seat belt anchor pretensioner (A) be removed after pushing the lock pin (B) as arrow direction.
3.
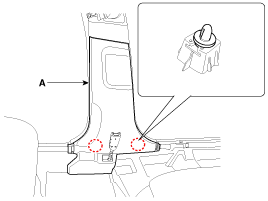
Remove the center pillar lower trim (A).
4.
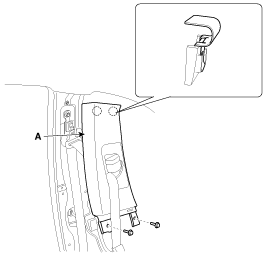
After loosening the mounting bolts, then remove the center pillar upper trim (A).
5.
Installation is the reverse of removal.
•
Replace any damaged clips.
Rear Pillar Trim Replacement
•
Put on gloves to protect your hands.
•
When prying with a flat-tip screwdriver, wrap it with protective tape to prevent damage.
•
Take care not to bend or scratch the trim and panels.
1.
After loosening the mounting bolt, then remove the rear pillar trim (A).
2.
Installation is the reverse of removal.
•
Replace any damaged clips.
Package Tray Trim Replacement
•
Put on gloves to protect your hands.
•
When prying with a flat-tip screwdriver, wrap it with protective tape to prevent damage.
•
Take care not to bend or scratch the trim and panels.
1.
Remove the rear seat assembly.
(Refer to the BD group - "Rear Seat")
2.
Remove the trunk trim.
(Refer to the BD group - "Trunk Trim")
3.
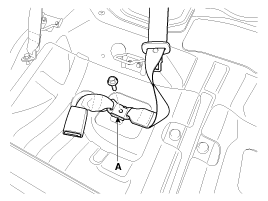
After loosening the mounting bolt, then remove the rear seat belt lower anchor (A).
Tightening torque:
39.2 ~ 53.9 N.m (4.0 ~ 5.5 kgf.m, 28.8 ~ 39.8 lb-ft)
4.
After loosening the mounting bolt, then remove the rear center seat belt lower anchor (A).
Tightening torque:
39.2 ~ 53.9 N.m (4.0 ~ 5.5 kgf.m, 28.8 ~ 39.8 lb-ft)
5.
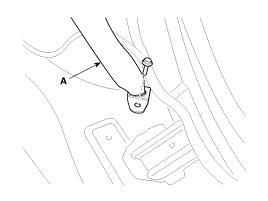
After loosening the mounting bolt, then remove the rear pillar trim (A).
6.
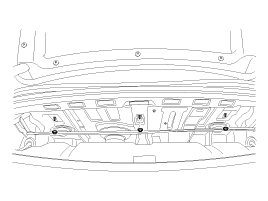
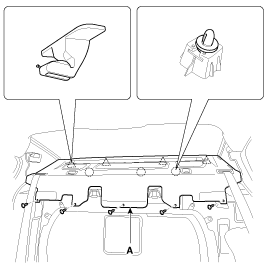
Loosen the trunk inner mounting nuts.
7.
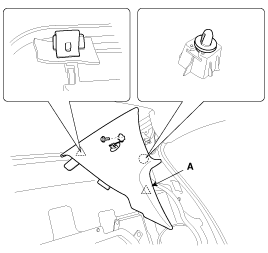
After loosening the mounting screws, then remove the package tray trim (A).
8.
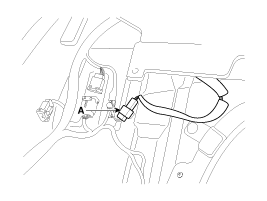
Disconnect the connector (A).
9.
Installation is the reverse of removal.
•
Replace any damage clips.
•
Make sure the connector is connected properly.
Components
1. Front pillar trim2. Center pillar upper trim3. Center pillar lower trim4. Rear pillar trim5. Cowl side trim6. Front door scuff trim7. Rear door scuff trim8. Rear package tray tri ...
Replacement
•
Put on gloves to protect your hands.
•
When plying with a flat-tip screwd river, wrap it with protective tape to prevent damage.
...
Other information:
Components
Component Functions
No.ComponentsQuantityMajor Role1SVM Unit1
–
Input video information from 4 channel cameras and process display
–
Vehicle communication (CAN) and system control
–
Screen output in 8 view modes
2Ultra optical camera(190 degrees)4
...
1.Carry the smart key or place it
inside the vehicle.
2.Make sure the parking brake is
firmly applied
3.Place the shift lever in P (Park).
Depress the brake pedal fully.
You can also start the engine when
the shift lever is in the N (Neutral)
position.
4.Press the ENGINE START/STOP
...
 Interior Trim Components and Components Location
 Trunk Trim Repair procedures


