
Kia Cadenza YG: Fuel Delivery System / Fuel Pump Motor Repair procedures
| Removal |
| 1. |
Remove the fuel pump.
(Refer to Fuel Delivery System - “Fuel Pump”) |
| 2. |
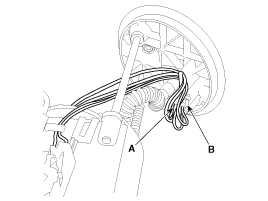
Disconnect the electric pump wiring connector (A) and the fuel sender connector (B).
|
| 3. |
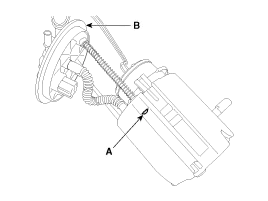
Remove the cushion pipe fixing clip (A), and then separate the head assembly (B) from reservoir cup.
|
| 4. |
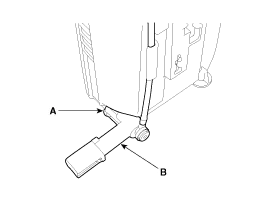
Remove the return nozzle (B) after releasing the fixing hook (A).
|
| 5. |
Remove the reservoir-cup after releasing the fixing hooks (A).
|

| 6. |
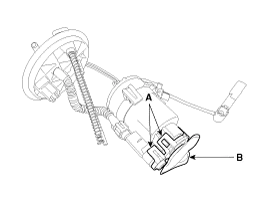
Remove the pre-filter (B) after releasing the fixing hooks (A).
|

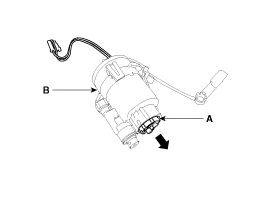
| 7. |
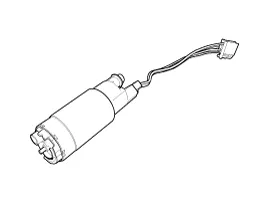
Separate the electric pump motor (A) from the fuel filter (B).
|
| Installation |
| 1. |
Install in the reverse order of removal. |
Removal 1. Remove the fuel pump. (Refer to Fuel Delivery System - “Fuel Pump”) 2. Disconnect the electric pump wiring connector (A) and the fuel sender connector (B).
Removal 1. Remove the fuel pump. (Refer to Fuel Delivery System - “Fuel Pump”) 2. Disconnect the fuel sender connector (A). 3. Remove the fuel sender (A) after releasing the fix hook.
Other information:
Kia Cadenza YG 2016-2021 Service Manual: Description and Operation
System Overview RPAS (Rear Parking Assist System) is an electronic driving aid that warns the driver to be cautious while parking or in low speed environments. The sensor uses ultrasonic waves to detect objects within proximity of the vehicle.
Kia Cadenza YG 2016-2021 Service Manual: Photo Sensor Repair procedures
Inspection 1. Ignition "ON" 2. Using the scan tool. 3. Emit intensive light toward photo sensor using a lamp, and check the output voltage change. 4. The voltage will rise with higher intensive light and reduce with lower intensive light.
Categories
- Manuals Home
- Kia Cadenza Owners Manual
- Kia Cadenza Service Manual
- Brake System
- Schematic Diagrams
- Specifications
- New on site
- Most important about car
