Kia Cadenza: Bumper / Rear Bumper Repair procedures
Kia Cadenza YG 2016-2025 Service Manual / Body (Interior and Exterior) / Bumper / Rear Bumper Repair procedures
| Replacement |
|

| 1. |
Remove the trunk trim.
(Refer to the BD group - "Trunk Trim") |
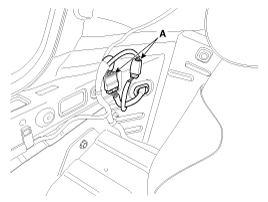
| 2. |
Disconnect the rear bumper main connectors (A).
|
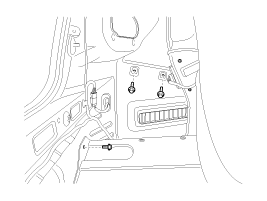
| 3. |
Loosen the trunk inner mounting bolts.
|
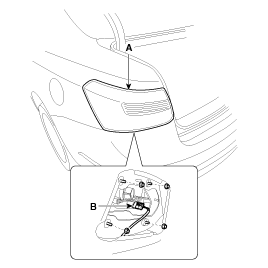
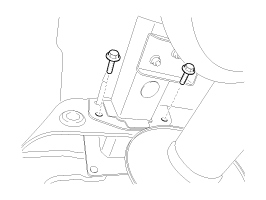
| 4. |
Disconnect the connector (B), and then loosen the rear combination lamp mounting nuts. |
| 5. |
Remove the rear combination lamp (A).
|
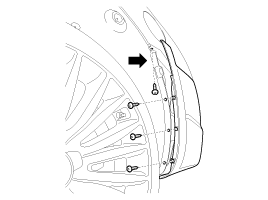
| 6. |
Loosen the rear bumper upper side mounting screw and clips.
|
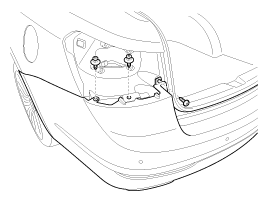
| 7. |
Loosen the rear bumper lower side mounting clips.
|
| 8. |
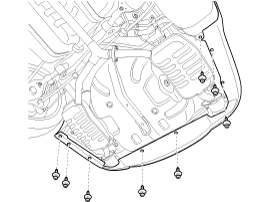
Loosen the mounting bolts.
|
| 9. |
After loosening the rear bumper side''s mounting screws, then disconnect the side''s.
|

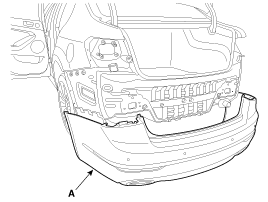
| 10. |
Remove the rear bumper cover (A).
|
| 11. |
Installation is the reverse of removal.
|
 Rear Bumper Components and Components Location
Components(1)
1. Rear bumper cover2. Rear bumper side bracket [RH]3. Rear bumper side bracket [LH]4. Tail trim cover
Components(2)
1. Rear bumper beam assembly2. Rear bumper energy absorber ...

Other information:
Kia Cadenza YG 2016-2025 Owners Manual: Emission control system
The emission control system of your vehicle is covered by a written limited warranty. Please see the warranty information contained in the Warranty & Consumer Information manual in your vehicle. Your vehicle is equipped with an emission control system to meet all applicable emissi ...
Kia Cadenza YG 2016-2025 Service Manual: Description and Operation
Function Of Safety Power Window When driver door power window auto-up switch is operated, safety function is activated. 1. Safety function condition When detect the force of 100N (using the 10N/mm spring) during the window rising, window is reversed. 2. Length of window reversing (except h ...
Copyright © www.kcadenzavg.com 2017-2025
