Kia Cadenza YG: Rear Curtain System / Rear Curtain Repair procedures
| Inspection |

| Removal |
| 1. |
Disconnect the negative (-) battery terminal. |
| 2. |
Remove the rear package tray (A) after removing the rear seat. (Refer to the Body group- interior trim)
|
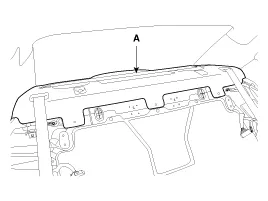
| 3. |
Remove the rear curtain (A) after removing the connector and bolts (8EA).
|

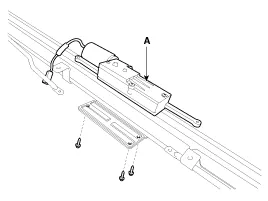
| 4. |
If necessary of removing the rear curtain motor (A), remove the screws (3EA).
|
| Installation |
| 1. |
Install the rear curtain and connector. |
| 2. |
Install the rear package tray and rear seat. |
| 3. |
Connect the negative (-) battery terminal. |
Circuit Diagram Rear Curtain Unit Connector PIN NO.ConnectorPIN NO.Connector1B+8IG22-9Inhibitor “R” switch3Power GND10Rear curtain switch4Power B+11Vehicle speed sensor5-12Inhibitor “P” switch6Motor UP13-7Signal GND14Motor DOWN
Inspection 1. AUTO UP/AUTO DOWN function (1) IGN ON, if you press the rear curtain switch, rear curtain motor operates the reverse direction of the before direction.
Other information:
Kia Cadenza YG 2016-2021 Service Manual: Compressor Repair procedures
Removal 1. If the compressor is marginally operable, run the engine at idle speed, and let the air conditioning work for a few minutes, then shut the engine off. 2. Disconnect the negative cable from the battery. 3. Recover the refrigerant with a recovery/charging station.
Kia Cadenza YG 2016-2021 Service Manual: Mode Control Actuator Repair procedures
Inspection 1. Ignition "OFF” 2. Disconnect the connector of mode control actuator. 3. Verify that the mode control actuator operates to the defrost mode when connecting 12V to the terminal 3and grounding terminal 7. 4. Verify that the mode control actuator operates to the vent mode when connecting in the reverse.
Categories
- Manuals Home
- Kia Cadenza Owners Manual
- Kia Cadenza Service Manual
- Timing Chain Repair procedures
- Body (Interior and Exterior)
- Schematic Diagrams
- New on site
- Most important about car
