Kia Cadenza: Lighting System / Room Lamp Repair procedures
Kia Cadenza YG 2016-2025 Service Manual / Body Electrical System / Lighting System / Room Lamp Repair procedures
| Inspection |
Room Lamp
| 1. |
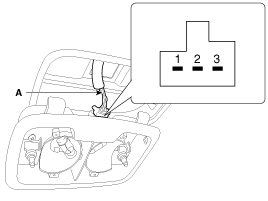
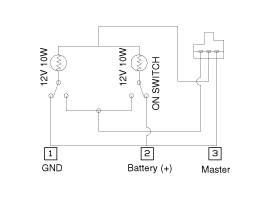
Check that the switch operates properly after disconnecting the room lamp connector (A).
|
| Removal |
Room Lamp
| 1. |
Disconnect the negative(-) battery terminal. |
| 2. |
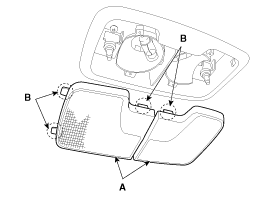
Carefully remove the lens (A) using a small screwdriver.
|
| 3. |
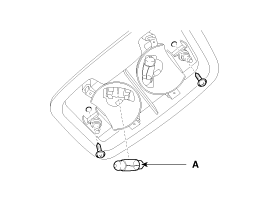
Remove the bulb (A) and room lamp after loosening the mounting screws.
|
| 4. |
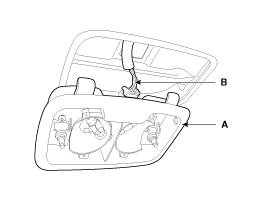
Remove the room lamp assembly (A) from the head lining after disconnecting the connector (B).
|
Vanity Lamp
| 1. |
Disconnect the negative (-) battery terminal. |
| 2. |
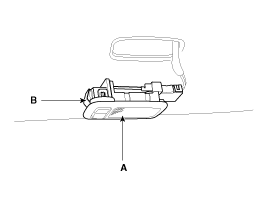
Remove the vanity lamp (A) by pressing the clip (B) with a flat-tip screwdriver.
|
| 3. |
Replace the bulb. |
| Installation |
Room Lamp
| 1. |
Reconnect the connector. |
| 2. |
Install the room lamp assembly. |
| 3. |
Install the lens. |
Vanity Lamp
| 1. |
Reconnect the vanity lamp connector. |
| 2. |
Install the vanity lamp. |
 Head Lamps Repair procedures
Inspection
1.
Check-points upon head lamp failure (HID)
(1)
Check the battery voltage. (Low beam will be on when the battery voltage above 9V.)
(2)
Check the fuse and relay.
(3)
Check th ...
 Overhead Console Lamp Repair procedures
Inspection
Overhead Console Lamp
Remove the overhead console lamp assembly then check for
continuity between terminals. If the continuity is not as specified,
replace the map lamp switch.
...
Other information:
Kia Cadenza YG 2016-2025 Service Manual: Schematic Diagrams
System Block Diagram Component Parts And Function Outline Component partFunctionVehicle-speed sensorConverts vehicle speed to pulse.ECMReceives signals from sensor and control switches.Cruise control indicatorIlluminate when CRUISE main switch is ON (Built into cluster)Cruise Control switchesC ...
Kia Cadenza YG 2016-2025 Service Manual: Rail Pressure Sensor (RPS) Repair procedures
Inspection 1. Connect the GDS on the Data Link Connector (DLC). 2. Measure the output voltage of the RPS at idle and various engine speed. ConditionOutput Voltage (V)Idle Approx. 1.21,500 rpm2.0 ~ 2.26,300 rpm Approx. 2.8 Removal 1. Turn the ignition switch OFF and dis ...
Copyright © www.kcadenzavg.com 2017-2025


