Kia Cadenza YG: Lighting System / Overhead Console Lamp Repair procedures
| Inspection |
| Overhead Console Lamp |

| No. | Description | No. | Description |
| 1 | Mood (+) | 4 | Battery (+) |
| 2 | - | 5 | Door (-) |
| 3 | Master (+) | 6 | GND |


| Removal |
| Overhead Console Lamp |
| 1. |
Disconnect the negative (-) battery terminal. |
| 2. |
Remove the overhead console lamp assembly.
(Refer to Body - "Roof Trim") |
| 3. |
Remove the overhead console lamp (B) after disconnecting the panoramaroof switch connector and lamp connector (A).
|

| 4. |
If necessary to replace the bulb, replace the bulb (C). |
| Deluxe Overhead Console Lamp |
| 1. |
Disconnect the negative (-) battery terminal. |
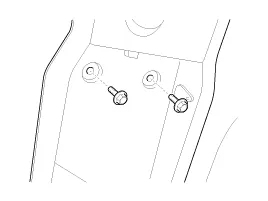
| 2. |
Open the holder and then remove the bolts (2EA).
|
| 3. |
Remove the deluxe overhead console lamp assembly.
(Refer to Body - "Roof Trim") |
| 4. |
Disconnect the connector (A).
|

| Installation |
| Overhead Console Lamp |
| 1. |
Install the overhead console lamp after connecting the panoramaroof switch connector and lamp connector. |
| 2. |
Install the lens after tightening 2 screws. |
| Deluxe Overhead Console Lamp |
| 1. |
Install the deluxe overhead console lamp assembly after connecting the connector. |
Inspection Room Lamp 1. Check that the switch operates properly after disconnecting the room lamp connector (A). Removal Room Lamp 1. Disconnect the negative(-) battery terminal.
Removal 1. Disconnect the negative(-) battery terminal. 2. Disconnect the connector (B) after removing the license lamp assembly (A). 3. Turn the license bulb socket (A) counterclockwise to remove the bulb.
Other information:
Kia Cadenza YG 2016-2021 Service Manual: Photo Sensor Repair procedures
Inspection 1. Ignition "ON" 2. Using the scan tool. 3. Emit intensive light toward photo sensor using a lamp, and check the output voltage change. 4. The voltage will rise with higher intensive light and reduce with lower intensive light.
Kia Cadenza YG 2016-2021 Service Manual: Temperature Control Actuator Repair procedures
Inspection 1. Ignition "OFF" 2. Disconnect the connector of temperature control actuator. 3. Verify that the temperature control actuator operates to the hot position when connecting 12V to the terminal 3 and grounding terminal 7. Verify that the temperature control actuator operates to the cool position when connecting in the rev
Categories
- Manuals Home
- Kia Cadenza Owners Manual
- Kia Cadenza Service Manual
- Automatic Transaxle System
- Alternator Schematic Diagrams
- Emission Control System
- New on site
- Most important about car
