Kia Cadenza YG: Tires/Wheels / Tire Repair procedures
| Tire wear |
| 1. |
Measure the tread depth of the tires.
|
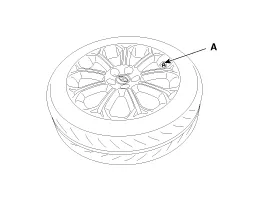
| 2. |
If the remaining tread depth (A) is less than the limit, replace the tire.
|


| Removal |
| 1. |
Remove the tire. |
| 2. |
Remove the foreign substance from wheel. |
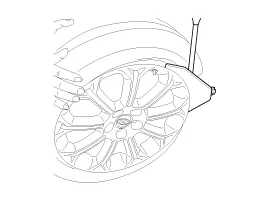
| 3. |
Discharge the air to the tire air inlet (A).
|
| 4. |
Install the bead brake from the tire and then remove the the tire rim by stepping slide bar, a pedal.
|
| 5. |
Carrying out the operation of the brake beads in various places until the fall tire completely from the rim. |
| 6. |
Put on the wheel turn table and then, fixed to the turntable wheel by stepping slide bar, a pedal. |
| 7. |
Install the rim of the wheel head mounting and then fixed.
|


| 8. |
Install the lever and then located to top tire between.
|

| 9. |
By stepping turntable pedal, rotated clockwise the turntable and then separate from the wheel outside the tire. |
| 10. |
Inside of the tire, it is to remove the tire from the wheel in the same way as No. 10.
|

| 11. |
Install in the reverse order of removal. |
Hub nut tightening sequence Tighten the hub nuts as follows. Tightening torque: 88.3 ~ 107.9N.m (9.0 ~ 11.0kgf.m, 65.1 ~ 79.6lb-ft) When using an impact gun, final tightening torque should be checked using a torque wrench.
Other information:
Kia Cadenza YG 2016-2021 Service Manual: Troubleshooting
Troubleshooting Examples of False-Alarm Occurrence from system characteristics (It’s not a problem) – Characteristics of EM Wave : EM Waves are reflected against all material and especially metal very well. Reflections of EM Waves are varies with the shape of object.
Kia Cadenza YG 2016-2021 Service Manual: Blower Resistor Repair procedures
Inspection 1. Measure terminal - to - terminal resistance of blower resistor. 2. If measure resistance isnot within specification, the blower resistor must be replaced. Replacement 1. Disconnect the negative (-) battery terminal. 2. Remove the crash pad lower cover (A) and then disconnect the connector (B).
Categories
- Manuals Home
- Kia Cadenza Owners Manual
- Kia Cadenza Service Manual
- Restraint
- Driveshaft and axle
- Body (Interior and Exterior)
- New on site
- Most important about car
