Kia Cadenza YG: Intake And Exhaust System / Air Cleaner Repair procedures
Kia Cadenza YG 2016-2021 Service Manual / Engine Mechanical System / Intake And Exhaust System / Air Cleaner Repair procedures
| Removal and Installation |
| 1. |
Remove the battery.
(Refer to Engine Electrical System - "Battery") |
| 2. |
Remove the engine cover. |
| 3. |
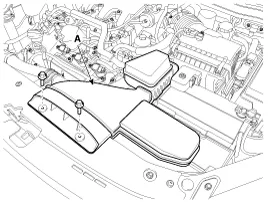
Remove the air duct (A).
|
| 4. |
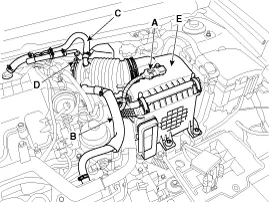
Remove the air cleaner assembly.
|
| 5. |
Install in the reverse order of removal. |
Components 1. Air duct2. Breather hose3. Air intake hose4. Air cleaner assembly
Components 1. Surge tank2. Surge tank stay
Other information:
Kia Cadenza YG 2016-2021 Service Manual: Specifications
Specification ItemSpecificationUltrasonic sensorVoltage ratingDC 12 VDetecting range30 cm ~ 120 cmOperation voltageDC 9 ~ 16 VOperation currentMAX 300 mAOperation temperature-30°C ~ +80°C (-22°C ~ +176°C)Operation frequency48 ± 5 KHzEffective operating velocity10 KPH (6.
Kia Cadenza YG 2016-2021 Service Manual: Compressor Repair procedures
Removal 1. If the compressor is marginally operable, run the engine at idle speed, and let the air conditioning work for a few minutes, then shut the engine off. 2. Disconnect the negative cable from the battery. 3. Recover the refrigerant with a recovery/charging station.
Categories
- Manuals Home
- Kia Cadenza Owners Manual
- Kia Cadenza Service Manual
- Suspension System
- Brake System
- Automatic Transaxle System
- New on site
- Most important about car

Copyright © 2026 www.kcadenzavg.com - 0.024