Kia Cadenza YG: Seat Electrical / Air Ventilation Seat Repair procedures
| Removal |
| 1. |
Remove the front seat assembly.
(Refer to Body - "Front Seat") |
| 2. |
Remove the seat back cover and cushion cover.
(Refer to Body - "Front Seat") |
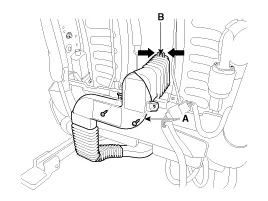
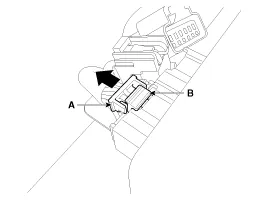
| 3. |
Remove the ventilation duct (A) after loosening screws and removing fixing hook (B).
|
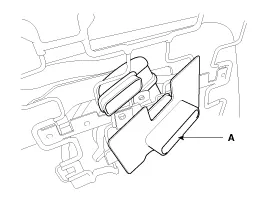
| 4. |
Remove the air ventilation panel (A) and fixing clip (B) from seat cushion.
|

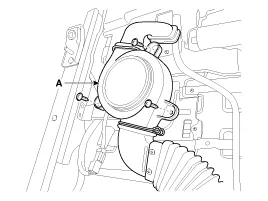
| 5. |
Remove the climate blower and duct (A) after loosening the fixing clips and screws.
|
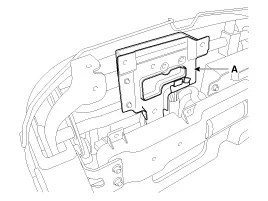
| 6. |
Remove the climate control unit (A) after loosening the mounting screws.
|


| Installation |
| 1. |
Install the connectors and air ventilation control unit. |
| 2. |
Install the air ventilation duct and blower. |
| 3. |
Install the seat back cover. |
| 4. |
Install the seat assembly and seat track cover. |
Description Using the blows power of FAN on seat, remove the moisture, sweat and warmth from occupants and surface of seats. It inhales the indoor air through the blower installed at the seat cushion lower part, and supplies the air into the seat cushion and the seat back through the duct.
Other information:
Kia Cadenza YG 2016-2021 Service Manual: Cluster ionizer Description and Operation
Description 1. The function of cluster ion generator is cleaning air by sterilizing and dissolving of air conditioner. 2. The function of cluster ion generator is controlling mold caused by stench of air conditioner and external inflow of air.
Kia Cadenza YG 2016-2021 Service Manual: Heater & A/C Control Unit (DATC) Repair procedures
Inspection Self diagnosis 1. Self-diagnosis process 2. How to read self-diagnostic code. After the display panel flickers three times every 0.5 second, the corresponding fault code flickers on the setup temperature display panel every 0.
Categories
- Manuals Home
- Kia Cadenza Owners Manual
- Kia Cadenza Service Manual
- Engine Control / Fuel System
- Alternator Schematic Diagrams
- Body Electrical System
- New on site
- Most important about car
