Kia Cadenza YG: Lubrication System / Oil Pan Repair procedures
Kia Cadenza YG 2016-2021 Service Manual / Engine Mechanical System / Lubrication System / Oil Pan Repair procedures
| Removal |
| [Lower oil pan] |
| 1. |
Remove the engine room under cover.
(Refer to Engine And Transaxle Assembly - "Engine Room Under Cover") |
| 2. |
Drain the engine oil.
(Refer to Lubrication System - "Engine Oil") |
| 3. |
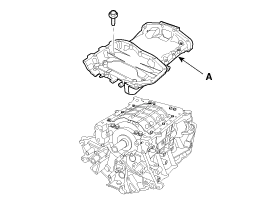
Remove the lower oil pan (A).
Insert the blade of SST(09215-3C000) between the upper oil
pan and lower oil pan. Cut off applied sealer and remove the lower oil
pan.
|


| [Upper oil pan] |
| 1. |
Remove the engine assembly from the vehicle.
(Refer to Engine And Transmission Assembly - "Engine And Transmission Assembly") |
| 2. |
Attach the engine to engine stand for disassembly. |
| 3. |
Remove the timing chain.
(Refer to Timing System - "Timing Chain") |
| 4. |
Remove the lower oil pan.
(Refer to Lubrication System - "Oil Pan") |
| 5. |
Remove the oil pump.
(Refer to Lubrication System - "Oil Pump") |
| 6. |
Remove the LH/RH exhaust manifold stays.
(Refer to Intake And Exhaust System - "Exhaust Manifold") |
| 7. |
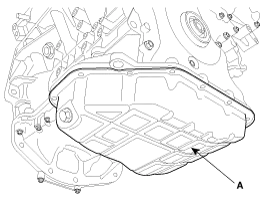
Remove the upper oil pan (A).
Insert the blade of SST(09215-3C000) between the upper oil
pan and sylinder block. Cut off applied sealer and remove the upper oil
pan.
|
| Installation |
| [Lower oil pan] |
| 1. |
Install the lower oil pan (A).
|
| 2. |
After assembly, wait at least 30 minutes before filling the engine with oil. |
| 3. |
Install the other parts in the reverse order of removal. |
| [Upper oil pan] |
| 1. |
Install the upper oil pan.
|
| 2. |
Install the other parts in the reverse order of removal. |
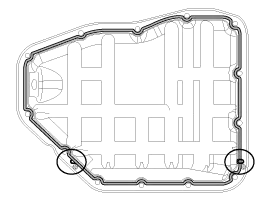
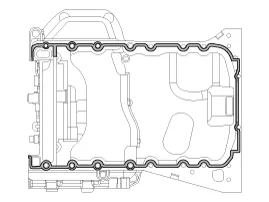
Components 1. Upper oil pan2. Lower oil pan3. Drain plug4. Drain plug gasket
Components 1. Oil pump2. O-ring3. Oil pump sprocket4. Oil pump chain cover
Other information:
Kia Cadenza YG 2016-2021 Service Manual: Description and Operation
System Overview RPAS (Rear Parking Assist System) is an electronic driving aid that warns the driver to be cautious while parking or in low speed environments. The sensor uses ultrasonic waves to detect objects within proximity of the vehicle.
Kia Cadenza YG 2016-2021 Service Manual: Description and Operation
Description System Overview The System offers the following features: – Human / machine interface through a 1-stage button, for terminal switching and engine start. – Control of external relays for ACC / IGN1 / IGN2 terminal switching and STARTER, without use of mechanical ignition switch.
Categories
- Manuals Home
- Kia Cadenza Owners Manual
- Kia Cadenza Service Manual
- Alternator Schematic Diagrams
- Rail Pressure Sensor (RPS) Schematic Diagrams
- Battery Troubleshooting
- New on site
- Most important about car

Copyright © 2026 www.kcadenzavg.com - 0.0197