
Kia Cadenza YG: Lighting System / Rear Combination Lamp Repair procedures
Kia Cadenza YG 2016-2021 Service Manual / Body Electrical System / Lighting System / Rear Combination Lamp Repair procedures
| Rear Combination Lamp (Outside) |
| 1. |
Disconnect the negative (-) battery terminal. |
| 2. |
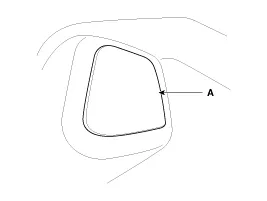
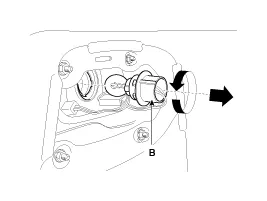
If the bulbs should be only replaced without removing lamp
assembly, replace the turn signal lamp bulb (B) after removing the trim
cover (A) in the trunk.
|
| 3. |
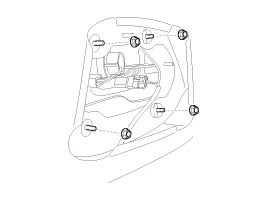
Remove the nuts (4EA).
|
| 4. |
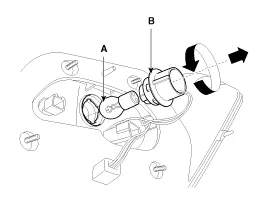
Remove the rear combination lamp (A) after disconnecting the connector (B).
|

| 5. |
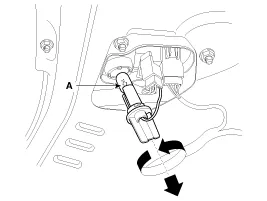
Turn the socket counterclockwise to remove the turn signal lamp bulb (A).
|
Rear Combination Lamp (Inside)
| 1. |
Disconnect the negative (-) battery terminal. |
| 2. |
If the bulbs should be only replaced without removing lamp
assembly, replace the back up lamp bulb (A) after removing the trim
cover in the trunk.
|
| 3. |
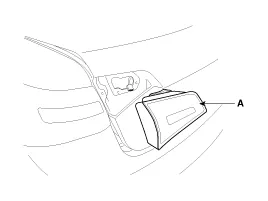
Remove the rear combination lamp (A) after removing the connector and nuts (3EA).
|
| 4. |
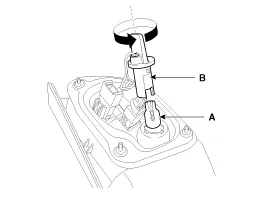
Turn the socket counterclockwise to remove the back up lamp bulb (A).
|
| Installation |
| 1. |
Install the rear combination lamp assembly after assembling the bulb. |
| 2. |
Install the lamp cover to the tailgate after connecting the lamp connector. |
Removal 1. Disconnect the negative(-) battery terminal. 2. Remove the roof trim. (Refer to Body - "Roof Trim") 3. Disconnect the connector of high mounted stop lamp.
Removal Mood Lamp 1. Disconnect the negative (-) battery terminal. 2. Remove the front door trim. (Refer to Body - "Front Door") 3. Remove the connector and LED mood lamp (A).
Other information:
Kia Cadenza YG 2016-2021 Service Manual: Components and Components Location
C
Kia Cadenza YG 2016-2021 Service Manual: Blind Spot Detection Unit Repair procedures
Removal 1. Disconnect the negative (-) battery terminal. 2. Remove the rear bumper. (Refer to Body - "Rear Bumper") 3. Remove the BSD unit (A) after loosening the mounting screws. Take care not to separate the bracket from rear bumper when removing the BSD sensor.
Categories
- Manuals Home
- Kia Cadenza Owners Manual
- Kia Cadenza Service Manual
- Engine Control / Fuel System
- Body (Interior and Exterior)
- Components and Components Location
- New on site
- Most important about car

Copyright © 2026 www.kcadenzavg.com - 0.0231