Kia Cadenza YG: Tires/Wheels / Wheel Repair procedures
Kia Cadenza YG 2016-2021 Service Manual / Suspension System / Tires/Wheels / Wheel Repair procedures
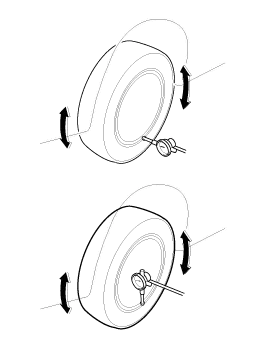
| Hub nut tightening sequence |
Tighten the hub nuts as follows.
Tightening torque:
88.3 ~ 107.9N.m (9.0 ~ 11.0kgf.m, 65.1 ~ 79.6lb-ft) |

When using an impact gun, final tightening torque should be checked using a torque wrench. |

Run out inspection
| 1. |
Jack up the vehicle. |
| 2. |
Measure the wheel Run-out by using a dial indicator as illustration below.
| ||||||||||||
| 3. |
If measured value exceeds the standard value, replace the wheel.
|
Tire wear 1. Measure the tread depth of the tires. Tread depth [limit] : 1.6 mm (0.063 in.) 2. If the remaining tread depth (A) is less than the limit, replace the tire.
Front wheel alignment When using a commercially available computerized wheel alignment equipment to inspect the front wheel alignment, always position the vehicle on a level surface with the front wheels facing straight ahead.
Other information:
Kia Cadenza YG 2016-2021 Service Manual: Surround View Monitoring Unit Repair procedures
Removal 1. Disconnect the negative (-) battery terminal. 2. Remove the glove box housing. (Refer to Body - "Glove Box Housing") 3. Remove the SVM unit (B) after disconnecting the connectors (A) and mounting bolts. Installation 1. Install the SVM unit.
Kia Cadenza YG 2016-2021 Service Manual: Components and Components Location
C
Categories
- Manuals Home
- Kia Cadenza Owners Manual
- Kia Cadenza Service Manual
- Schematic Diagrams
- Steering System
- Body Electrical System
- New on site
- Most important about car

Copyright © 2026 www.kcadenzavg.com - 0.0214