Kia Cadenza: Intake And Exhaust System / Muffler Repair procedures
Kia Cadenza YG 2016-2025 Service Manual / Engine Mechanical System / Intake And Exhaust System / Muffler Repair procedures
| Removal and Installation |
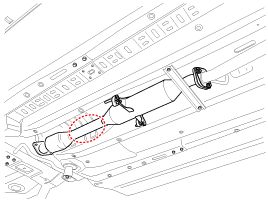
Front Muffler
| 1. |
Disconnect the battery negative terminal. |
| 2. |
Remove the engine room under cover.
(Refer to Engine And Transaxle Assembly – “Engine Room Under Cover”) |
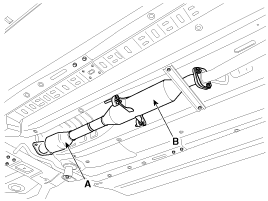
| 3. |
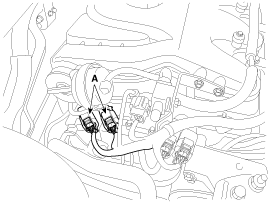
Disconnect the RH front, rear oxygen sensor connector (A).
|
| 4. |
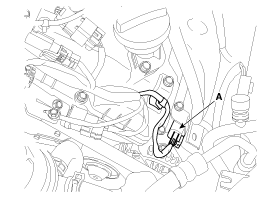
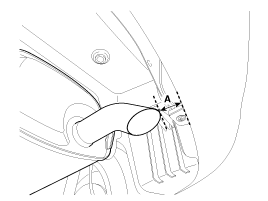
Disconnect LH front oxygen sensor connector (A).
|
| 5. |
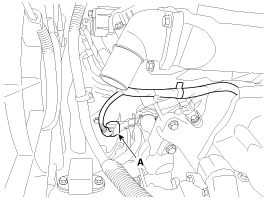
Disconnect the LH rear oxygen sensor connector (A).
|
| 6. |
Remove the front muffler (A).
|


| 7. |
Install in the reverse order of removal. |
Center Muffler
| 1. |
Disconnect the battery negative terminal. |
| 2. |
Remove the catalytic converter & center muffler assembly (A).
|

| 3. |
Install in the reverse order of removal. |
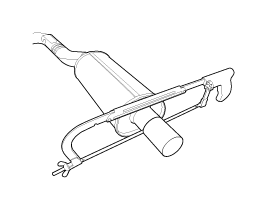
Main Muffler
| 1. |
Disconnect the battery negative terminal. |
| 2. |
Remove the main muffler (A).
|
| 3. |
Install in the reverse order of removal. |
Replacement procedure of center muffler using clamp
Under warranty : Replace the center muffler assembly.
Out of warranty : It is available to replace the center muffler as the procedure below.
| 1. |
Check that the clamping part of the center muffler assembly is damaged or deformed.
If the muffler is too corroded to clamp, replace the center muffler assembly.
|
| 2. |
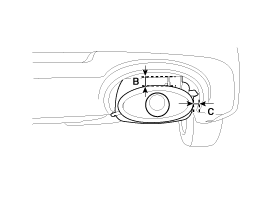
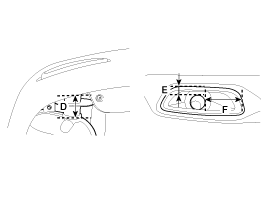
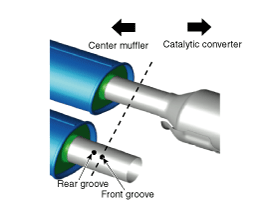
Record the gap (A, B, C, D, E, F) between the tail pipe (or tail trim) and the rear bumper.
[Pipe type]
[Trim type]
[Bumper-integrated trim type]
|
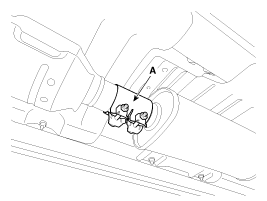
| 3. |
Remove the catalytic converter & center muffler (A).
|
| 4. |
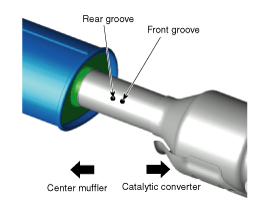
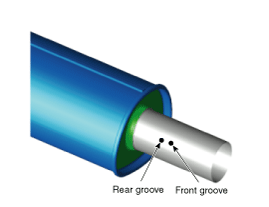
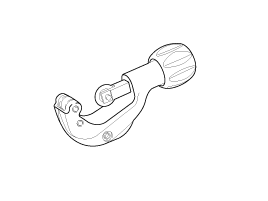
Cut the center muffler as the instruction below.
[With groove]
[Without groove]
[Replacement muffler]
|

| 5. |
Install the center muffler.
|
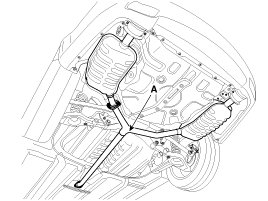
 Muffler Components and Components Location
Components
1. Front muffler2. Catalytic converter & center muffler assembly3. Main muffler4. Gasket5. Hanger
...

Other information:
Kia Cadenza YG 2016-2025 Service Manual: Repair procedures
Teaching Procedures 1. Key Teaching Procedure Key teaching must be done after replacing a defective PCM(ECM) or when providing additional keys to the vehicle owner. The procedure starts with an PCM(ECM) request for vehicle specific data (PIN code: 6digits) from the tester. The "virgin" PCM ...
Kia Cadenza YG 2016-2025 Service Manual: Front Oil Seal Repair procedures
Replacement 1. Remove the crankshaft damper pulley. (Refer to Timing System - "Crankshaft Damper Pulley") 2. Remove the front oil seal (A). 3. Using SST(09231-3C100), install a new front oil seal. Do not reuse the front oil seal. &nbs ...
Copyright © www.kcadenzavg.com 2017-2025
