Kia Cadenza YG: Lighting System / Door Lamp Repair procedures
| Removal |
| Mood Lamp |
| 1. |
Disconnect the negative (-) battery terminal. |
| 2. |
Remove the front door trim.
(Refer to Body - "Front Door") |
| 3. |
Remove the connector and LED mood lamp (A).
|

| 4. |
Remove the rear door trim.
(Refer to Body - "Rear Door") |
| 5. |
Remove the connector and LED mood lamp (A).
|
| Door Lamp |
| 1. |
Disconnect the negative (-) battery terminal. |
| 2. |
Remove the front door trim.
(Refer to Body - "Front Door") |
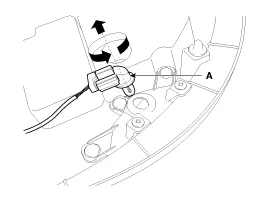
| 3. |
Turn the socket counterclockwise to remove the door lamp bulb (A).
|
| Installation |
| Mood Lamp |
| 1. |
Install the door mood lamp after connecting the connector. |
| 2. |
Install the door trim. |
| 3. |
Connect the negative (-) battery terminal. |
| Door Lamp |
| 1. |
Install the door lamp after connecting the connector. |
| 2. |
Install the door trim. |
| 3. |
Connect the negative (-) battery terminal. |
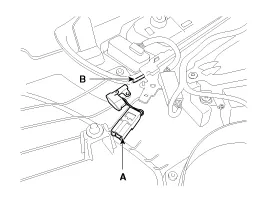
Rear Combination Lamp (Outside) 1. Disconnect the negative (-) battery terminal. 2. If the bulbs should be only replaced without removing lamp assembly, replace the turn signal lamp bulb (B) after removing the trim cover (A) in the trunk.
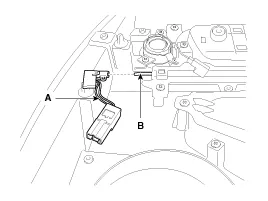
Removal 1. Disconnect the negative (-) battery terminal. 2. Remove the luggage room lamp (B) when prying the hole (A) with a flat-up screwdriver.
Other information:
Kia Cadenza YG 2016-2021 Service Manual: Description and Operation
Description Back view camera will activate when the backup light is ON with the ignition switch ON and the shift lever in the R position. This system is a supplemental system that shows behind the vehicle through the ECM (Reverse Display Room Mirror) mirror or AVN head unit while backing-up.
Kia Cadenza YG 2016-2021 Service Manual: Blower Unit Components and Components Location
Component Location Components 1. Duct Seal2. Duct Case3. Inlet Door4. Intake Actuator5. Inlet Duct Case (A)6. Climate control air filter7. Cluster Ionizer8. Climate control air filter Cover9. Blower Upper Case10. Blower Lower Case11. FET12. Resistor13.
Categories
- Manuals Home
- Kia Cadenza Owners Manual
- Kia Cadenza Service Manual
- Engine Control / Fuel System
- Alternator Schematic Diagrams
- Restraint
- New on site
- Most important about car
