Kia Cadenza YG: Driveshaft Assembly / Front Driveshaft Components and Components Location
Kia Cadenza YG 2016-2021 Service Manual / Driveshaft and axle / Driveshaft Assembly / Front Driveshaft Components and Components Location
| Component Location |
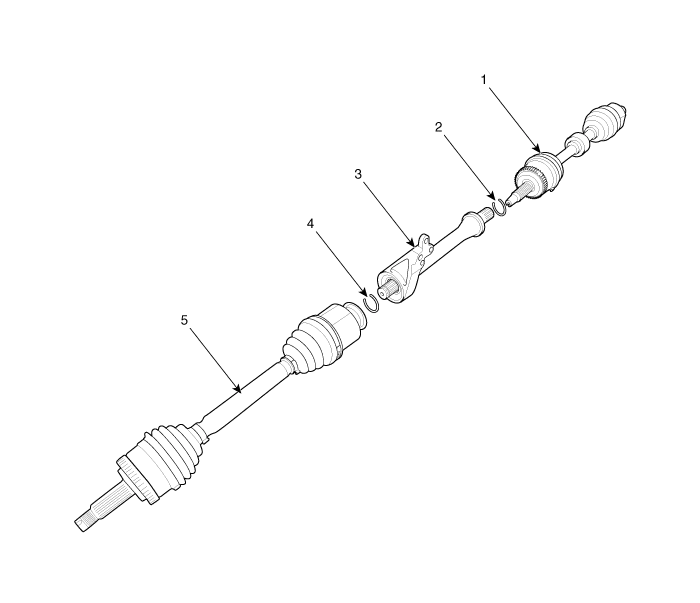
| 1. Driveshaft(LH) 2. Circlip 3. Inner shaft bearing bracket assembly | 4. Circlip 5. Driveshaft(RH)6. |
| Components |
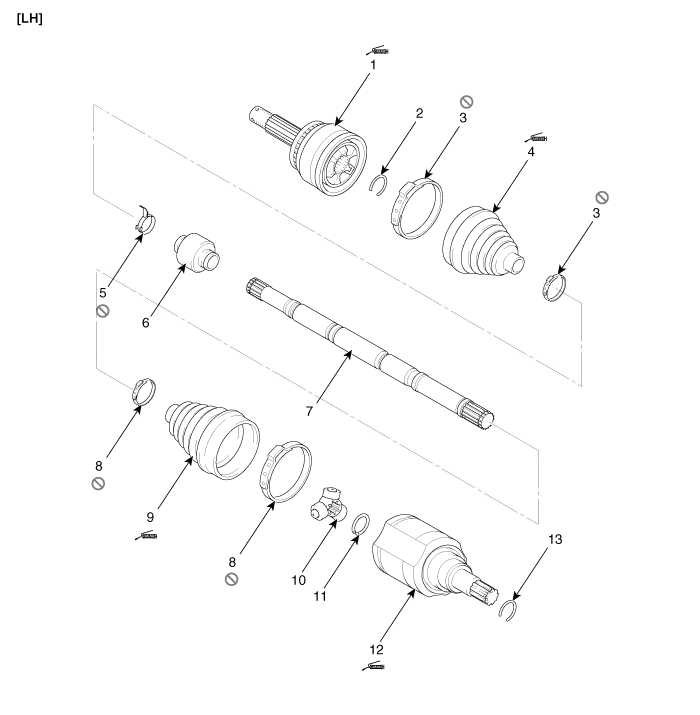
| 1. BJ Assembly 2. Clip 3. BJ Boot Band 4. BJ Boot | 5. Dynamic Damper Band 6. Dynamic Damper 7. Shaft 8. UTJ Boot Band | 9. UTJ Boot 10. Spider Assembly 11. Clip 12. UTJ Case | 13.Clip |
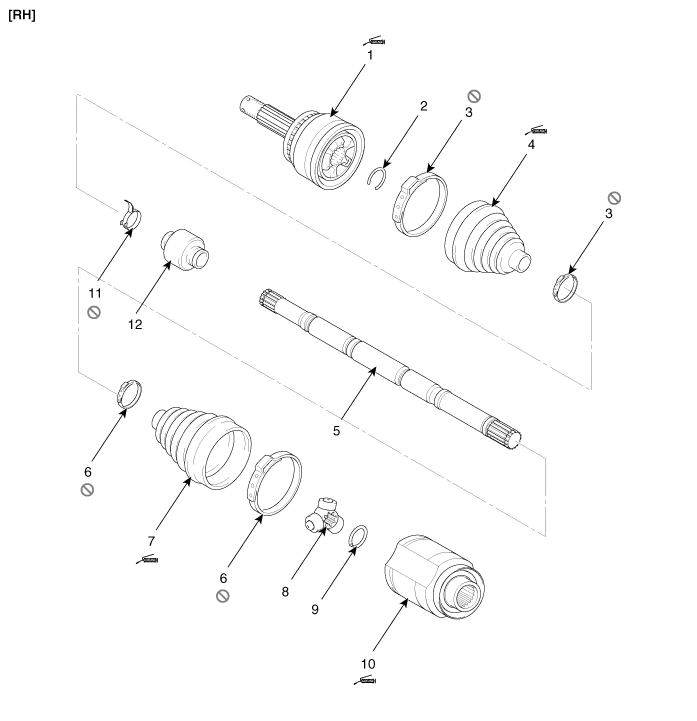
| 1. BJ Assembly 2. Clip 3. BJ Boot Band 4. BJ Boot | 5. Shaft 6. UTJ Boot Band 7. UTJ Boot 8. Spider Assembly | 9. Clip 10. UTJ Case 11. Dynamic Damper Band 12. Dynamic Damper |
Replacement 1. Loosen the wheel nuts slightly. Raise the vehicle, and make sure it is securely supported. 2. Remove the front wheel and tire (A) from front hub.
Other information:
Kia Cadenza YG 2016-2021 Service Manual: Troubleshooting
Troubleshooting Problem Symptoms Table Before replacing or repairing air conditioning components, first determine if the malfunction is due to the refrigerant charge, air flow or compressor. Use the table below to help you find the cause of the problem.
Kia Cadenza YG 2016-2021 Service Manual: Photo Sensor Repair procedures
Inspection 1. Ignition "ON" 2. Using the scan tool. 3. Emit intensive light toward photo sensor using a lamp, and check the output voltage change. 4. The voltage will rise with higher intensive light and reduce with lower intensive light.
Categories
- Manuals Home
- Kia Cadenza Owners Manual
- Kia Cadenza Service Manual
- Driveshaft and axle
- Specifications
- Components and Components Location
- New on site
- Most important about car

Copyright © 2026 www.kcadenzavg.com - 0.0364