Kia Cadenza YG: Intake And Exhaust System / Air Cleaner Repair procedures
Kia Cadenza YG 2016-2021 Service Manual / Engine Mechanical System / Intake And Exhaust System / Air Cleaner Repair procedures
| Removal and Installation |
| 1. |
Remove the battery.
(Refer to Engine Electrical System - "Battery") |
| 2. |
Remove the engine cover. |
| 3. |
Remove the air duct (A).
|
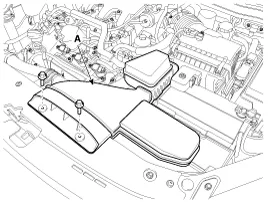
| 4. |
Remove the air cleaner assembly.
|
| 5. |
Install in the reverse order of removal. |
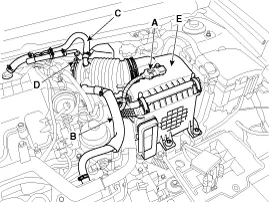
Components 1. Air duct2. Breather hose3. Air intake hose4. Air cleaner assembly
Components 1. Surge tank2. Surge tank stay
Other information:
Kia Cadenza YG 2016-2021 Service Manual: Schematic Diagrams
Circuit Diagram SVM System Input/Output 1. Camera input ItemSpecificationLens angle of view190 degreesAngle of viewHorizontal186 degreesVertical135 degreesFunctionProvides the original image of the wide angle image (no additional function)Application locationSame camera applied to the front, rear, left and right 2.
Kia Cadenza YG 2016-2021 Service Manual: Pantoscopic Camera Components and Components Location
C
Categories
- Manuals Home
- Kia Cadenza Owners Manual
- Kia Cadenza Service Manual
- Timing Chain Repair procedures
- Engine Control / Fuel System
- Suspension System
- New on site
- Most important about car

Copyright © 2026 www.kcadenzavg.com - 0.0272