Kia Cadenza YG: Exterior / Body Side Moulding Repair procedures
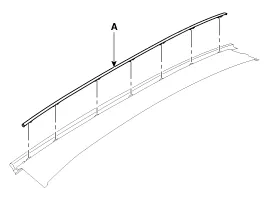
Roof Moulding Replacement
•
When prying with a flat-tip screwdriver, wrap itwith
protective tape, and apply protective tapearound the related parts, to
prevent damaged.
•
Put on gloves to protect your hands.
•
Take care not to scratch the body surface.
1.
Using a screwdriver or remover, remove the roof moulding (A).
2.
Installation is the reverse of removal.
•
Replace any damage clips.
Fender Garnish Replacement
•
When prying with a flat-tip screwdriver, wrap it with
protective tape, and apply protective tape around the related parts, to
prevent damage.
•
Put on gloves to protect your hands.
•
Take care not to scratch the body surface.
1.
Using a screwdriver or remover, remove the fender garnish (A).
2.
Installation is the reverse of removal.
•
Replace any damage clips.
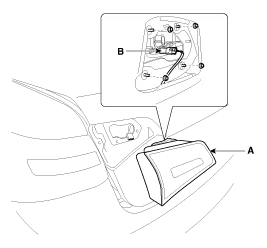
Trunk Lid Garnish Replacement
•
When prying with a flat-tip screwdriver, wrap itwith
protective tape, and apply protective tapearound the related parts, to
prevent damaged.
•
Put on gloves to protect your hands.
•
Take care not to scratch the body surface.
1.
Remove the trunk lid trim.
(Refer to the BD group - "Trunk Iid")
2.
After loosening the mounting nuts, then disconnect the rear combination lamp connector (B).
3.
Remove the rear combination lamp (A).
4.
Loosen the trunk lid back panel mounting nuts (A).
5.
Using a screwdriver or remover, remove the trunk lid back panel (A).
6.
Using a screwdriver or remover, remove the trunk lid garnish (A).
7.
Installation is the reverse of removal.
•
Replace any damage clips.
•
Make sure the trunk lid locks/unlocks and opens/closes properly.
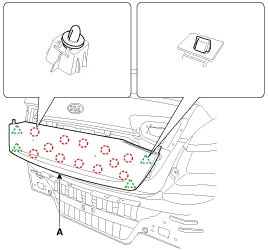
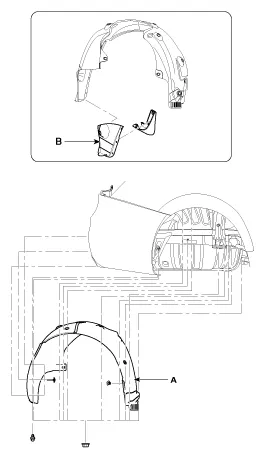
Front Wheel Guard And Mud Guard Replacement
•
When prying with a flat-tipped screwdriver, wrap it with
protective tape, and apply protective tape around the related parts, to
prevent damaged
•
Put on gloves to protect your hands.
•
Take care not to scratch the body surface.
1.
Remove the front tire.
2.
After loosening the mounting clips and screws, then remove the front wheel guard (A), mud guard (B).
3.
Installation is the reverse of removal.
•
Replace any damage clips.
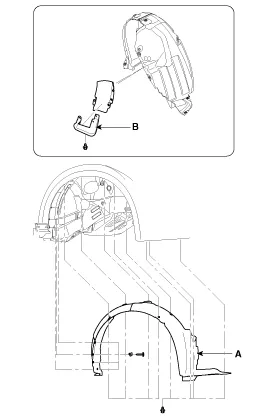
Rear Wheel Guard And Mud Guard Replacement
•
When prying with a flat-tipped screwdriver, wrap it with
protective tape, and apply protective tape around the related parts, to
prevent damaged
•
Put on gloves to protect your hands.
•
Take care not to scratch the body surface.
2.
After loosening the mounting clips and nut, then remove the rear wheel guard (A) and mud guard (B)
3.
Installation is the reverse of removal.
•
Replace any damage clips.
Door Garnish Replacement
•
When prying with a flat-tipped screwdriver, wrap it with
protective tape, and apply protective tape around the related parts, to
prevent damaged.
•
Put on gloves to protect your hands.
•
Take care not to scratch the body surface
1.
Using a screwdriver or remover, remove the front door garnish (A).
2.
Using a screwdriver or remover, remove the rear door garnish (B).
3.
Installation is the reverse of removal.
•
Replace any damage clips.
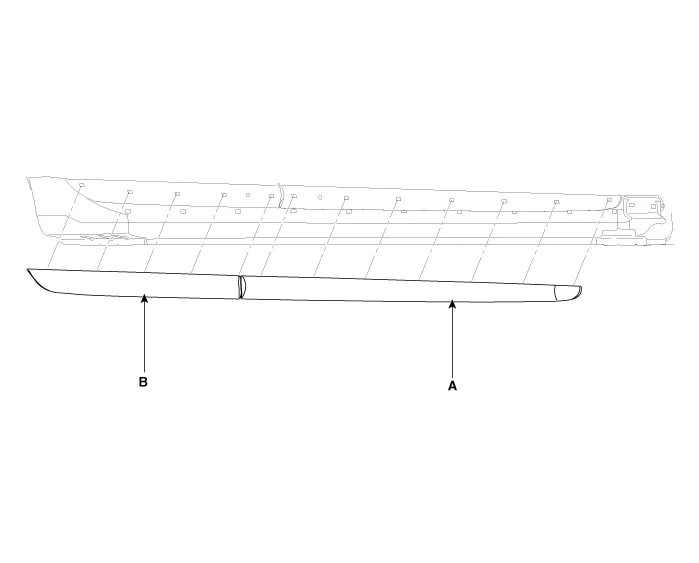
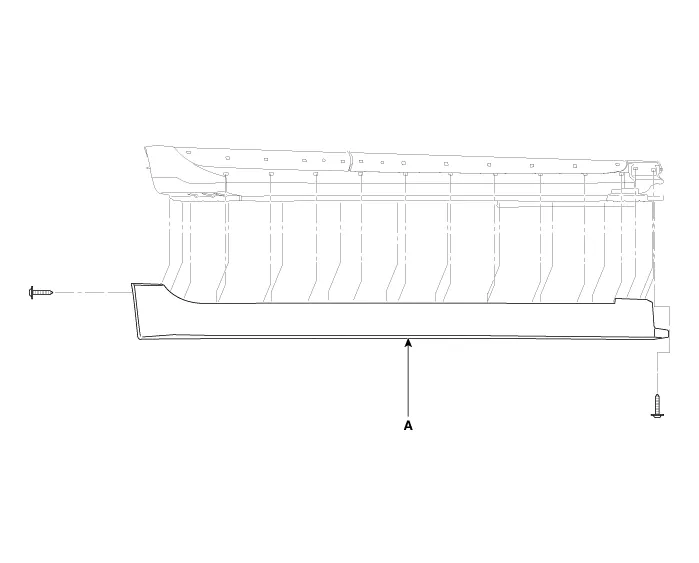
Side Sill Garnish Replacement
•
When prying with a flat-tip screwdriver, wrap itwith
protective tape, and apply protective tapearound the related parts, to
prevent damaged.
•
Put on gloves to protect your hands.
•
Take care not to scratch the body surface.
1.
Loosen the mounting screws.
2.
Using a screwdriver or remover, remove the side sill garnish (A).
3.
Installation is the reverse of removal.
•
Replace any damage clips
Replacement
Door Trim Replacement
•
Be careful not to scratch the door trim and other parts.
•
Put on gloves to protect your hands.
Components
1. Roof moulding2. Movable glass3. Wind deflector4. Folding cover assembly5. Front cover assembly6. Panoramaroof frame assembly7. Roller blind assembly8.
Other information: S
Replacement
1.
Discharge refrigerant from refrigeration system.
2.
Replace faulty tube or hose.
Cap the open fittings immediately to keep moisture or dirt out of the system.
3.
Tighten joint of bolt or nut to specified torque.