Kia Cadenza YG: Cylinder Block / Rear Oil Seal Repair procedures
Kia Cadenza YG 2016-2021 Service Manual / Engine Mechanical System / Cylinder Block / Rear Oil Seal Repair procedures
| Removal |
| 1. |
Remove the transaxle assembly.
(Refer to Automatic Transaxle System - "Automatic Transaxle") |
| 2. |
Remove the drive plate.
(Refer to Cylinder Block - "Drive Plate") |
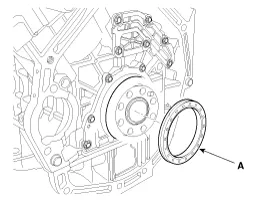
| 3. |
Remove the rear oil seal (A).
|
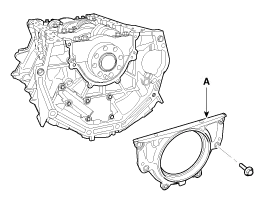
| 4. |
Remove the rear oil seal case (A).
|
| Installation |
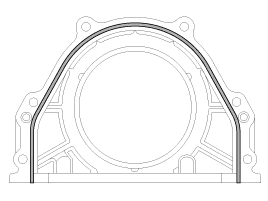
| 1. |
Install the rear oil seal case(A).
|

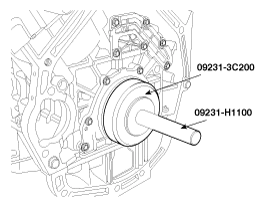
| 2. |
Using SST(09231-3C200, 09231-H1100), install the rear oil seal.
|
| 3. |
Install the other parts in the reverse order of removal. |
Components 1. Rear oil seal2. Oil seal case
Components 1. Piston ring2. Piston pin3. Snap ring4. Piston5. Connecting rod6. Connecting rod upper bearing7. Connecting rod lower bearing8. Connecting rod bearing cap
Other information:
Kia Cadenza YG 2016-2021 Service Manual: Description and Operation
Description The immobilizer system will disable the vehicle unless the proper ignition key is used, in addition to the currently available anti-theft systems such as car alarms, the immobilizer system aims to drastically reduce the rate of auto theft.
Kia Cadenza YG 2016-2021 Service Manual: Ambient Sensor Repair procedures
Inspection 1. Ignition "OFF" 2. Disconnect ambient temperature sensor. 3. Check the resistance of ambient temperature sensor between terminals 1 and 2 whether it is changed by changing of the ambient temperature. 1. Sensor Ground2.
Categories
- Manuals Home
- Kia Cadenza Owners Manual
- Kia Cadenza Service Manual
- General Information
- Body (Interior and Exterior)
- Engine Control / Fuel System
- New on site
- Most important about car

Copyright © 2026 www.kcadenzavg.com - 0.0194