
Kia Cadenza YG: Windshield Deicer / Windshield Deicer Switch Repair procedures
Kia Cadenza YG 2016-2021 Service Manual / Body Electrical System / Windshield Deicer / Windshield Deicer Switch Repair procedures
| Inspection |
| 1. |
The windshield deicer switch inputs can be checked using the GDS. |
| 2. |
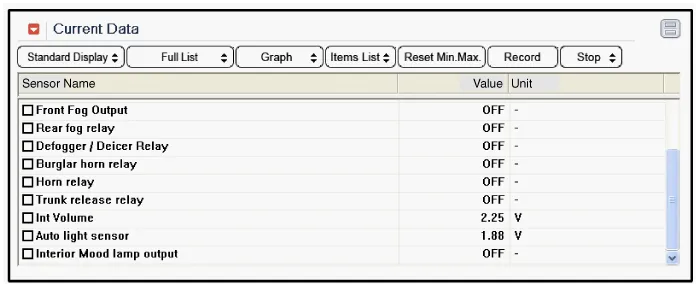
To check the input value of windshield deicer switch, select option "IPM". |
| 3. |
Select option "Current Data".
|
| 4. |
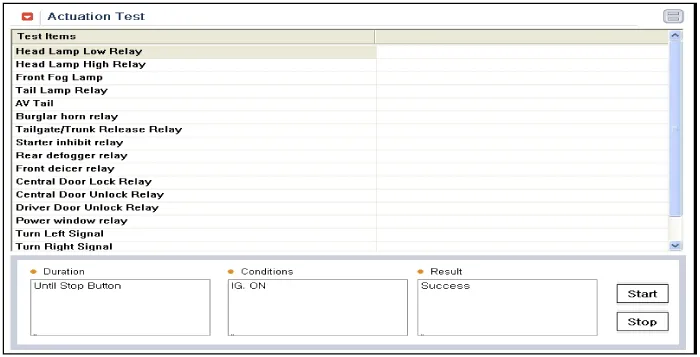
To check the input value of windshield deicer switch in force mode, select option.
|
| Removal |
| 1. |
Disconnect the negative (-) battery terminal. |
| 2. |
Remove the center fascia panel.
(Refer to Body - "Crash Pad") |
| 3. |
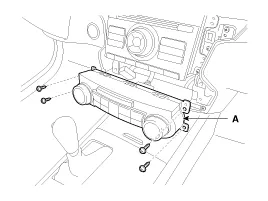
Remove the heater control unit (A) after removing screws (4EA).
|
| Installation |
| 1. |
Install the heater control unit. |
| 2. |
Install the center fascia panel. |
Inspection 1. Remove the cowl top cover. (Refer to the wiper) 2. Disconnect the windshield deicer connector (A) from the wiper motor linkage. 3.
Other information:
Kia Cadenza YG 2016-2021 Service Manual: Description and Operation
Description Adaptive Front-lighting System (AFLS) AFLS(Adaptive Front-lighting System)is a headlamp orientation control system that takes into account both steering angle and vehicle speed to orient the headlamps to an angle that provides better nighttime visibility.
Kia Cadenza YG 2016-2021 Service Manual: Photo Sensor Repair procedures
Inspection 1. Ignition "ON" 2. Using the scan tool. 3. Emit intensive light toward photo sensor using a lamp, and check the output voltage change. 4. The voltage will rise with higher intensive light and reduce with lower intensive light.
Categories
- Manuals Home
- Kia Cadenza Owners Manual
- Kia Cadenza Service Manual
- Schematic Diagrams
- Engine Electrical System
- Body Control Module (BCM) Description and Operation
- New on site
- Most important about car

Copyright © 2026 www.kcadenzavg.com - 0.0274