Kia Cadenza YG: Restraint / Components and Components Location
| Components |

| 1. Driver Airbag (DAB) 2. Steering Wheel 3. Clock Spring 4. Passenger Airbag (PAB) 5. Side Airbag (SAB) 6. Curtain Airbag (CAB) 7. Seat Belt Buckle Switch (BS) 8. Seat Belt Pretensioner (BPT) | 9. Front Impact Sensor (FIS) 10. Rear Side Impact Sensor (RSIS) 11. Supplemental Restraint System Control Module (SRSCM) 12. Airbag Warning Lamp 13. Pressure Side Impact Sensor (P-SIS) 14. Telltale Lamp 15. Anchor Pretensioner (APT) 16. Occupant Detection System (ODS) |
| Components Location |
| Supplemental Restraint System Control Module (SRSCM) |

| Driver Airbag (DAB) / Passenger Airbag (PAB) |

| Side Airbag (SAB) |

| Curtain Airbag (CAB) |

| Seat Belt Pretensioner (BPT) |

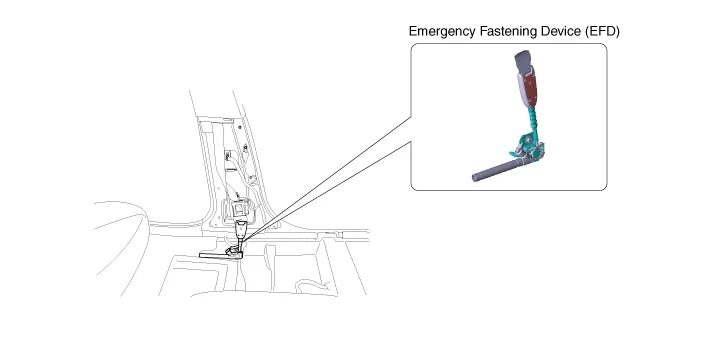
| Emergency Fastening Device (EFD) |
| Front Impact Sensor (FIS) |

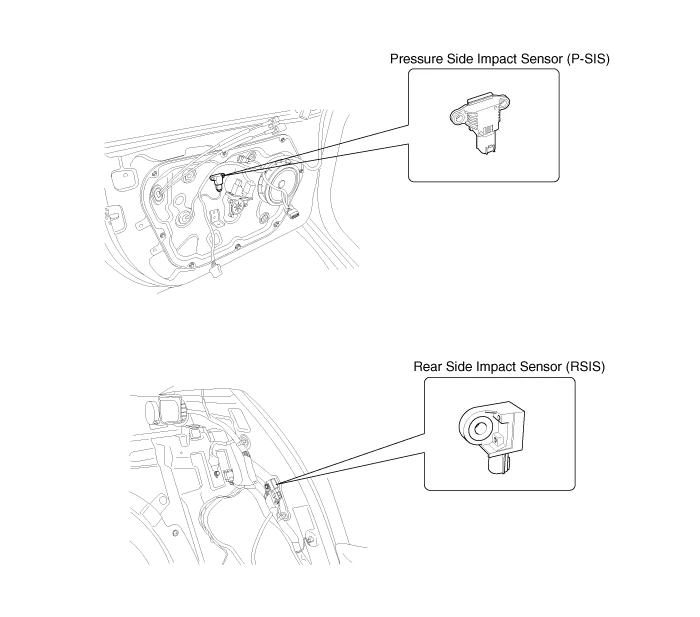
| Side Impact Sensor (SIS) / Pressure Side Impact Sensor (P-SIS) |
Tightening Torques ItemN.mkgf.mlb-ftDriver airbag (DAB)7.8 ~ 10.80.8 ~ 1.15.8 ~ 8.0Passenger airbag (PAB)7.8 ~ 11.80.8 ~ 1.25.8 ~ 8.7Curtain airbag (CAB)Bolt9.
Warning Lamp Activation Warning Lamp Behavior after Ignition On As soon as the operating voltage is applied to the SRSCM ignition input, the SRSCM activates the warning lamp for a LED lamp check.
Other information:
Kia Cadenza YG 2016-2021 Service Manual: Blower Unit Components and Components Location
Component Location Components 1. Duct Seal2. Duct Case3. Inlet Door4. Intake Actuator5. Inlet Duct Case (A)6. Climate control air filter7. Cluster Ionizer8. Climate control air filter Cover9. Blower Upper Case10. Blower Lower Case11. FET12. Resistor13.
Kia Cadenza YG 2016-2021 Service Manual: Blower Motor Repair procedures
Inspection 1. Connect the battery voltage and check the blower motor rotation. 2. If the blower motor voltage is not operated well, substitute with a known-good blower motor and check for proper operation. 3. If the problem is corrected, replace the blower motor.
Categories
- Manuals Home
- Kia Cadenza Owners Manual
- Kia Cadenza Service Manual
- Transaxle Control Module (TCM) Repair procedures
- Body (Interior and Exterior)
- Components and Components Location
- New on site
- Most important about car
