Kia Cadenza YG: Bumper / Front Bumper Repair procedures
| Replacement |
|

| 1. |
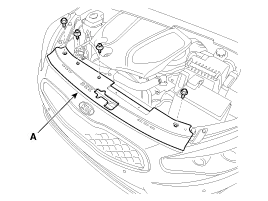
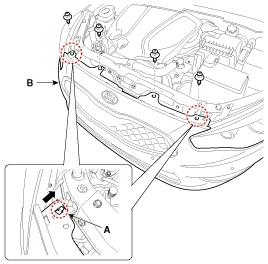
After loosening the mounting bolts, then remove the engine room air duct (A).
|

| 2. |
After loosening the mounting bolts and clips, then remove the radiator grill upper guide (A).
|
| 3. |
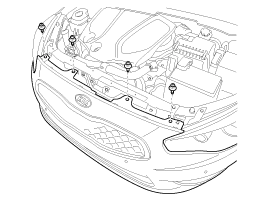
Remove the front bumper upper side mounting clips.
|
| 4. |
Remove the front bumper lower side mounting clips.
|
| 5. |
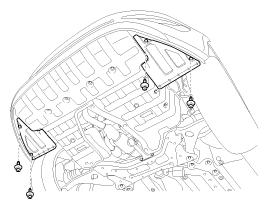
After loosening the front bumper side''s mounting screw, then disconnect the side''s.
|

| 6. |
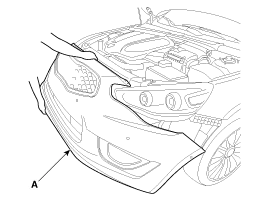
Remove the front bumper cover.
|
| 7. |
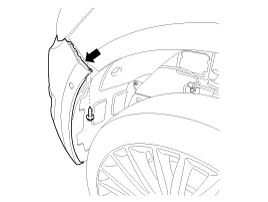
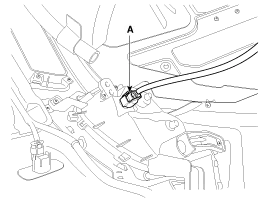
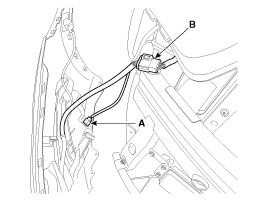
Disconnect the fog lamp connector (A) and front bumper main connector (B).
[LH]
[RH]
|
| 8. |
Installation is the reverse of removal.
|
Components(1) 1. Front bumper cover2. Front bumper upper weatherstrip3. Radiator grill upper guide4. Front bumper side bracket [LH]5. Front bumper side bracket [RH] Components(2) 1.
Components(1) 1. Rear bumper cover2. Rear bumper side bracket [RH]3. Rear bumper side bracket [LH]4. Tail trim cover Components(2) 1. Rear bumper beam assembly2.
Other information:
Kia Cadenza YG 2016-2021 Service Manual: Description and Operation
Description Back view camera will activate when the backup light is ON with the ignition switch ON and the shift lever in the R position. This system is a supplemental system that shows behind the vehicle through the ECM (Reverse Display Room Mirror) mirror or AVN head unit while backing-up.
Kia Cadenza YG 2016-2021 Service Manual: Condenser Repair procedures
Inspection 1. Check the condenser fins for clogging and damage. If clogged, clean them with water, and blow them with compressed air. If bent, gently bend them using a screwdriver or pliers. 2. Check the condenser connections for leakage, and repair or replace it, if required.
Categories
- Manuals Home
- Kia Cadenza Owners Manual
- Kia Cadenza Service Manual
- Suspension System
- Engine Electrical System
- Engine Mechanical System
- New on site
- Most important about car
