Kia Cadenza YG: Automatic Transaxle Control System / Inhibitor Switch Repair procedures
Kia Cadenza YG 2016-2021 Service Manual / Automatic Transaxle System / Automatic Transaxle Control System / Inhibitor Switch Repair procedures
| Inspection |
|

Power Circuit Inspection
| 1. |
Disconnect the Inhibitor swtich connector. |
| 2. |
Ignition KEY "ON"" & Engine "OFF". |
| 3. |
Measure voltge between supplied power and ground at inhibitor circuit.
|
Signal Circuit Inspection
| 1. |
Connect the Inhibitor switch connector. |
| 2. |
Ignition KEY "ON" & Engine "OFF". |
| 3. |
Measure voltages between each terminal and chassis ground during shift lever changed "P, R, N, D".
Signal Code Table
|
| Removal |
| 1. |
Place the shift lever into the "N" position. |
| 2. |
Remove the air cleaner assembly.
(Refer to Engine Mechanical System - "Air cleaner") |
| 3. |
Remove the battery and the battery tray.
(Refer to Engine Electrical System - "Battery") |
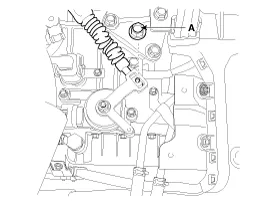
| 4. |
Disconnect the inhibitor switch connector (A).
|

| 5. |
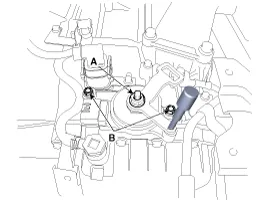
Remove the shift cable mounting nut (A).
|
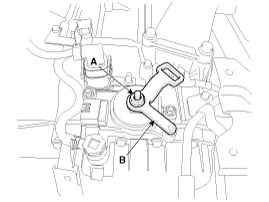
| 6. |
Remove the manual control lever (B) and the washer after removing a nut (A).
|
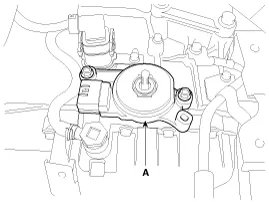
| 7. |
Remove the inhibitor switch (A) after removing the bolts (2ea).
|
| Installation |
| 1. |
Check that the shift lever is placed in the "N" position |
| 2. |
Install the inhibitor switch (A).
|
| 3. |
Install the manual control lever (A).
|
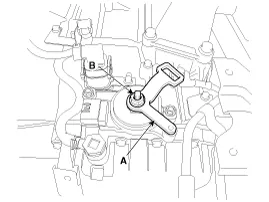
| 4. |
Align the hole (A) in the manual control lever with the "N"
position hole (B) of the inhibitor switch and then insert the SST
inhibitor switch guide pin (09480-A3800).
|
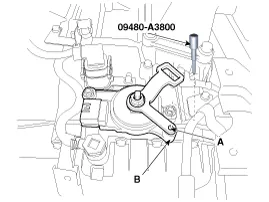
| 5. |
Tighten the nut (A) and bolts (B) with the specified torque.
|
| 6. |
Remove the SST (09480-A3800) from the hole. |
| 7. |
Connect the inhibitor switch connector (A).
|
| 8. |
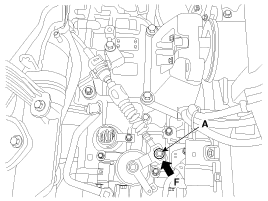
Install the shift cable by tightening nut (A).
|
| 9. |
Push the shift cable to the arrow "F" to eliminate free play and then tighten the nut (A) with the specified torque.
|
| 10. |
Install the battery and battery tray.
(Refer to Engine Electrical System - "Battery") |
| 11. |
Install the air cleaner assembly.
(Refer to Engine Mechanical System - "Air cleaner") |
Circuit Diagram
Components 1. Shift lever knob & Boots assembly2. Shift lever assembly 3. Control cable assembly
Categories
- Manuals Home
- Kia Cadenza Owners Manual
- Kia Cadenza Service Manual
- Schematic Diagrams
- Engine Control / Fuel System
- Brake System
- New on site
- Most important about car

Copyright © 2026 www.kcadenzavg.com - 0.025