
Kia Cadenza YG: Driveshaft and axle / Special Service Tools
| Special Service Tools |
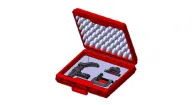
| Tool Name / Number | Illustration | Description |
| Band installer 09495-3K000 |
| Installation of ear type boot band |
| Band installer 09495-39100 |
| Installation of hook type boot band |
| Lower arm ball joint remover 0K545-A9100 |
| Removal of front lower arm from front axle |


Specification Engine & T/MJoint typeMax. permissible angleInnerOuterInnerOuterLambda 3.3 GDIVTJ#25BJ#2621°46.5° Tightening Torques ItemN.
Troubleshooting Trouble SymptomProbable causeRemedyVehicle pulls to one sideScoring of driveshaft ball jointReplaceWear, rattle or scoring of wheel bearingReplaceDefective front suspension and steeringAdjustment or ReplaceVibrationWear, damage or bending of driveshaftReplaceDriveshaft rattle and hub serrationReplaceWear, rattle or scratching of wheel bearingReplaceShimmyDefective wheel balanceAdjustment or ReplaceDefective front suspension and steeringAdjustment or ReplaceExcessive noiseWear, damage or bending of driveshaftReplaceRattle of driveshaft and worn hub splinesReplaceWear, rattle or scoring of wheel bearingReplaceLoose hub nutAdjustment or ReplaceDefective front suspension and steeringAdjustment or Replace
Other information:
Kia Cadenza YG 2016-2021 Service Manual: Repair procedures
Inspection Initialization and diagnosis sequence by using diagnostic equipment Below content summarize the procedure for A/S using Diagnostic equipment Download Parameter 1. Select "AFLS" menu after selecting a vehicle. 2. Select "Parameter download" menu for define a characteristc of vehicle.
Kia Cadenza YG 2016-2021 Service Manual: Heater Unit Components and Components Location
Component Location Components 1. Heater Case (LH)2. Separator3. Evaporator Core4. Shower Duct (LH)5. Heater Core Cover6. Heater Core7. Mode Actuator8. Mode Cam9. Temp Actuator (Drive)10. Vent Door Arm11. Floor Door Arm 1. Heater Case (RH)2.
Categories
- Manuals Home
- Kia Cadenza Owners Manual
- Kia Cadenza Service Manual
- Specifications
- Steering System
- Engine Mechanical System
- New on site
- Most important about car
