Kia Cadenza YG: AVN System / Steering Wheel Remote Controller (SWRC) Repair procedures
Kia Cadenza YG 2016-2021 Service Manual / Body Electrical System / AVN System / Steering Wheel Remote Controller (SWRC) Repair procedures
| Inspection |
[Steering Remote Control Switch]
| 1. |
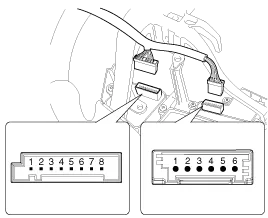
Check the audio remote control switch for resistance between terminals in each switch position.
[Audio (LH)]
[Cruise + Voice (RH)]
[Bluetooth (LH)]
[Trip (RH)]
|
| Removal |
[Steering Wheel Remote Control Switch]
| 1. |
Remove the driver airbag module.
(Refer to Restraint - "Driver Airbag (DAB) Module and Clock Spring") |
| 2. |
Remove the steering wheel.
(Refer to Steering System - "Steering Column & Shaft") |
| 3. |
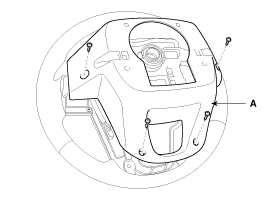
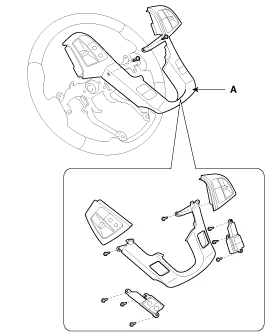
Remove the steering wheel cover (A) after loosening the screws.
|
| 4. |
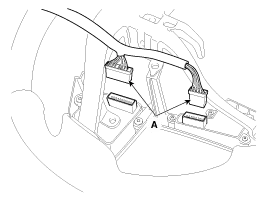
Remove the steering wheel remote control switch connector (A).
[LH - Audio]
[RH - Bluetooth]
|
| 5. |
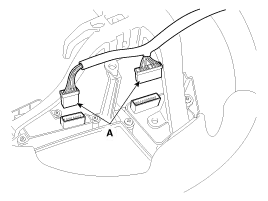
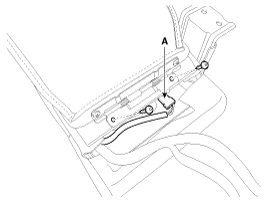
Remove the steering wheel remote control switch (A) after loosening the mounting screws.
|
[Rear Seat Remote Control Switch]
| 1. |
Remove the rear seat armrest.
(Refer to Body - "Rear Seat") |
| 2. |
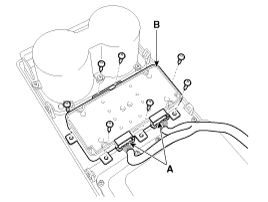
Disconnect the connector (A) after loosening the mounting screws.
|
| 3. |
Remove the rear seat remote control switch (B) after loosenig the mounting screws and disconnecting the connector (A).
|
| Installation |
[Steering Wheel Remote Control Switch]
| 1. |
Reassemble the steering wheel remote control switch. |
| 2. |
Reassemble the steering wheel cover. |
| 3. |
Reassemble the steering wheel. |
| 4. |
Reassemble the steering wheel remote control switch and airbag connector.
|

| 5. |
Reassemble the driver airbag module. |
[Rear Seat Remote Control Switch]
| 1. |
Install the rear seat remote control switch. |
| 2. |
Install the rear seat armrest cover. |
| 3. |
Install the rear seat. |
Circuit Diagram
Circuit Diagram
Other information:
Kia Cadenza YG 2016-2021 Service Manual: Description and Operation
Description Adaptive Front-lighting System (AFLS) AFLS(Adaptive Front-lighting System)is a headlamp orientation control system that takes into account both steering angle and vehicle speed to orient the headlamps to an angle that provides better nighttime visibility.
Kia Cadenza YG 2016-2021 Service Manual: Description and Operation
Description Surround View Monitoring System (SVM) is the system that allows video monitoring of 360 degrees around the vehicle. The system includes 4 ultra optical camera mounted around the vehicle (front, both sides, rear). The video from these cameras are applied with distortion compensation, time point conversion, and video merging
Categories
- Manuals Home
- Kia Cadenza Owners Manual
- Kia Cadenza Service Manual
- Restraint
- Components and Components Location
- Transaxle Control Module (TCM) Repair procedures
- New on site
- Most important about car

Copyright © 2026 www.kcadenzavg.com - 0.0269