Kia Cadenza YG: Front Suspension System / Front Cross Member Repair procedures
| Replacement |
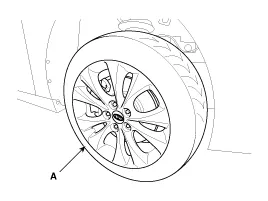
| 1. |
Remove the front wheel & tire.
|

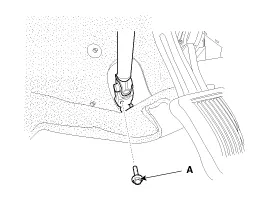
| 2. |
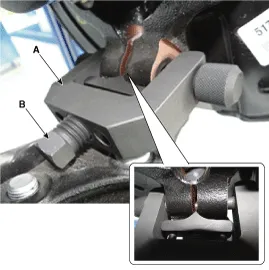
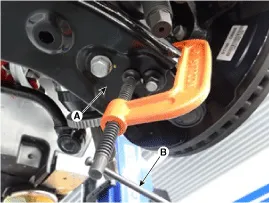
Loosen the bolt (A) and then disconnect the universal joint assembly from the pinion of the steering gear box.
|
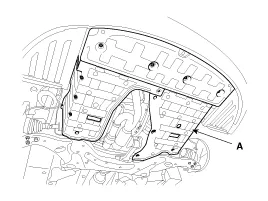
| 3. |
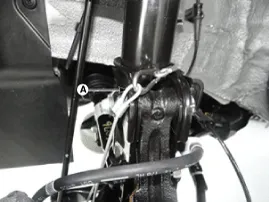
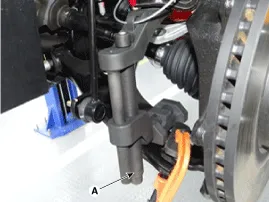
Remove the under cover (A).
|
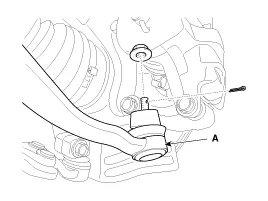
| 4. |
Remove the sprit pin and castle nut and then disconnect the tie-rod end (A) from the front knuckle.
|
| 5. |
Loosen the bolt & nut and then remove the lower arm (A).
|

| 6. |
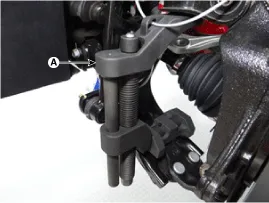
Remove the front lower arm from the front knuckle using the SST (0K545-A9100).
|


| 7. |
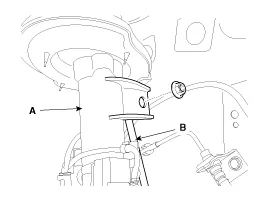
Disconnect the stabilizer link (B) with the front strut assembly (A) after loosening the nut.
|
| 8. |
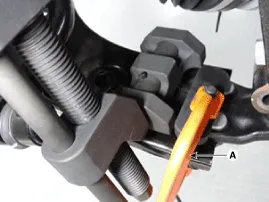
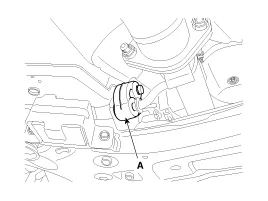
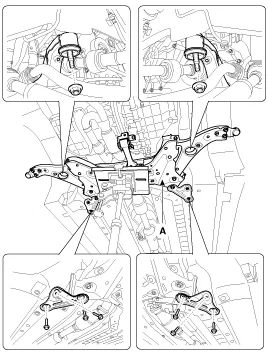
Loosen the bolt and then remove the front roll stopper (A).
|

| 9. |
Disconnect the muffler rubber hanger (A).
|
| 10. |
Loosen the bolts & nuts and then remove the sub frame.
|
| 11. |
Installation is the reverse of removal. |
| 12. |
Remove the front lower arm.
(Refer to Front Suspension System - "Front Lower Arm") |
| 13. |
Remove the front stabilizer bar.
(Refer to Front Suspension System - "Front Stabilizer Bar") |
| 14. |
Remove the steering gearbox.
(Refer to Steering System - "Steering Gearbox") |
| 15. |
Installation is the reverse of removal. |
Replacement 1. Remove the front wheel & tire. Tightening torque: 88.3 ~ 107.9N.m (9.0 ~ 11.0kgf.m, 65.1 ~ 79.6lb-ft) Be careful not to damage to the hub bolts when removing the front wheel & tire.
Other information:
Kia Cadenza YG 2016-2021 Service Manual: Auto Head lamp leveling Unit Repair procedures
Removal Height Sensor 1. Remove the height sensor connector (A). 2. Loosen the mounting bolts(Body: 2EA, chassis: 1EA) from height sensor bracket. Tightening torque : 3 ~ 5N.m (30 ~ 50kgf.m, 2.21 ~ 3.68lb-ft) 3. Remove the height sensor.
Kia Cadenza YG 2016-2021 Service Manual: Intake Actuator Repair procedures
Inspection 1. Ignition "OFF". 2. Disconnect the intake actuator connector. 3. Verify that the actuator operates to the recirculation position when connecting 12V to the terminal 3 and grounding terminal 7. 4. Verify that the intake actuator operates to the fresh position when connecting in the reverse.
Categories
- Manuals Home
- Kia Cadenza Owners Manual
- Kia Cadenza Service Manual
- Engine And Transmission Assembly
- Transaxle Control Module (TCM) Repair procedures
- Steering System
- New on site
- Most important about car
